Hot Air Balloon is one of the most beautiful figures to make a String Art. Their shape it’s simple and lovely, but it also it’s good base to create volume effects, geometric figures or even replace the outline and fill it with another figures or animals.
Hot Air Balloon String Art templates
Fist of all, we want to bring you some Hot Air Ballon free templates in case you want to print it and use it to make easier the process. Here you have some of them:
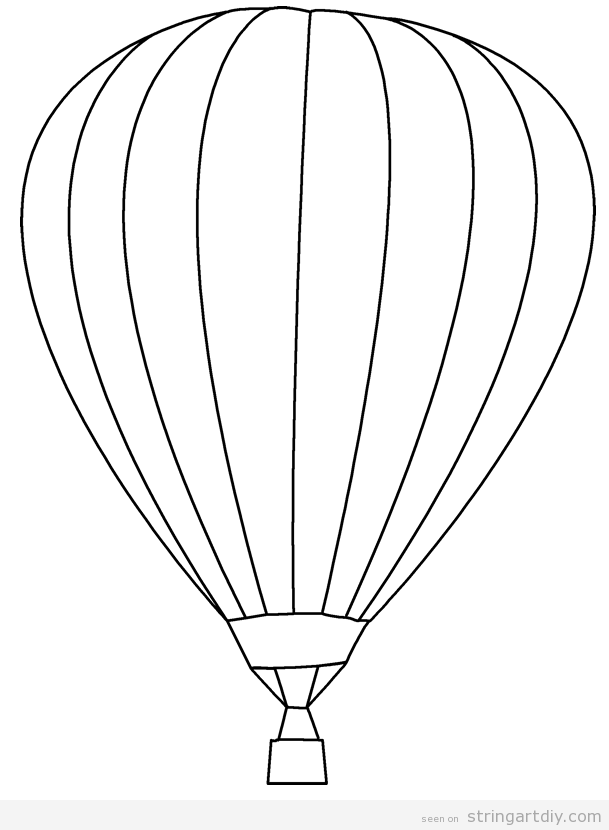
Source: Get Coloring Pages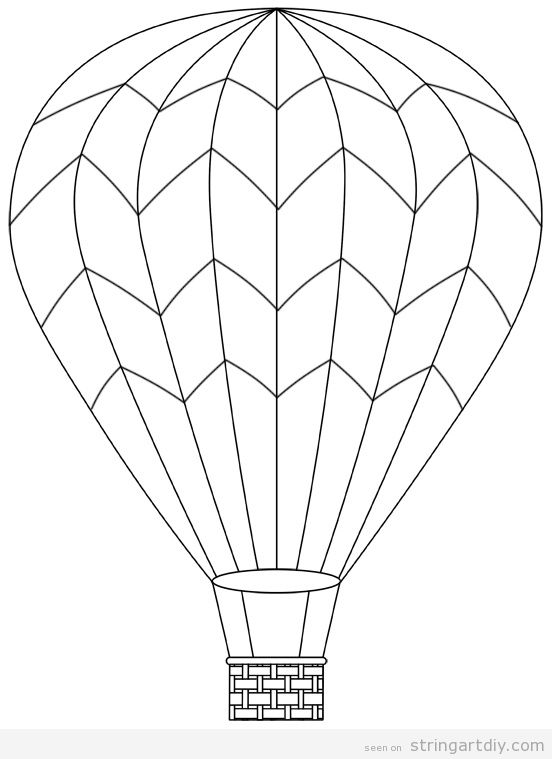
Source: Bird’s Cards Source: Hello Kids
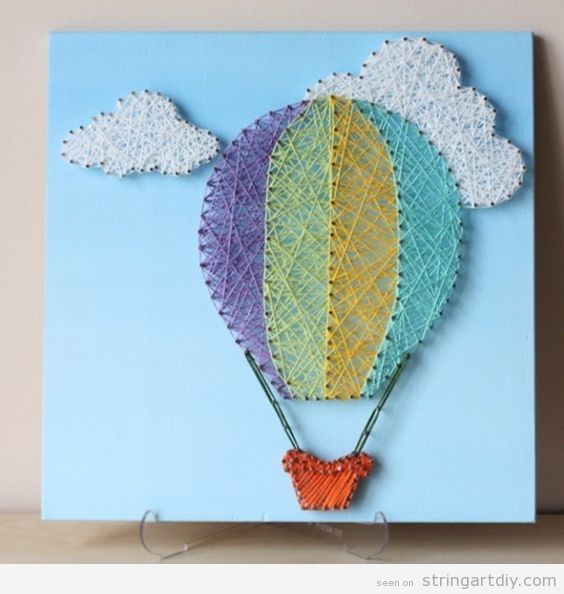
Simple Hot Air Balloon String Art
Let’s start with some simple Hot Air Balloon String Art that you can made it easly. They are a beutiful idea to decorate a nursery or a baby clothes shop.
Oow, this air balloon surronded by clouds and made by mintiwall it’s just perfect.
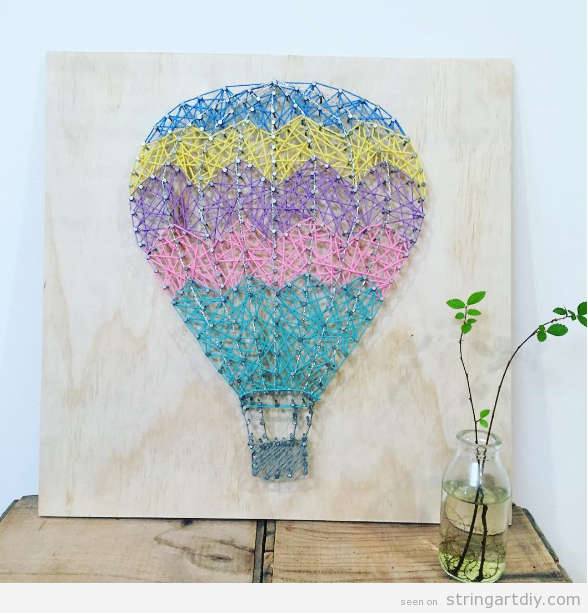
We really find this String Art nice because with a colorful zig-zag print creates a volume effect. This is a handmade project made by @simply_stringart.
Hot Air Balloon Butterflies String Art
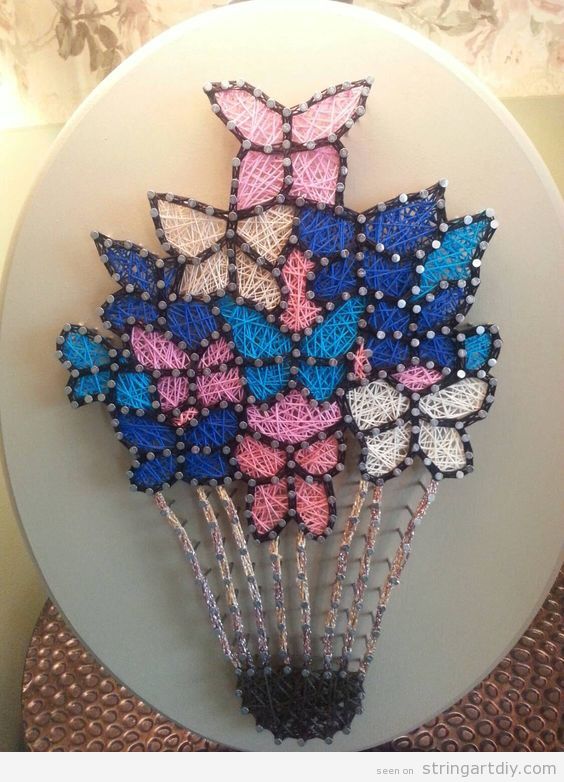
As we can see, Beachmade has replaced the classical hot air balloon outline for butterflies and the result it’s absolutely amazing.
We hope that you find this resources and ideas useful in order to Do it Yourself. Maybe, after finished the String Art, you can gave it to a child as a present or event sell it on flea markets and online shops. Have a nice week!
Creativity is infinite and boundless, so we keep searching and finding new designs to make plenty of String Art projects. Today we want to show you this kind of challenge in Versus Youtube Channel where two girls try to make a String Art: one of them creates a Facebook Thumbs Up symbol and, the other one, creates the “Versus” word. Let’s take a look to the process:
As you can see, the symbol has won the challenge and it looks a little bit better than “Versus”, so let’s focus on this one. First of all, you need a thumbs up template:

You can download this pattern in full size to print in this link: Thumbs Up Template
Then, you put the pattern on the board and pin the nails over the shape using a hammer. Once you finished, remove the pattern and start to cross the threads over the nails. We recommend you to use three tones of blue, one darker to the edges, one lighter to the cuff and one even lighter to the hand. Add some red to the cuff button!
We hope you like this project and enjoy making them! This is a nice low cost project to decorate your bedroom, so let’s go.
Hi, guys! I have found a wonderful Facebook page called La Hilería and it is full of beautiful String Art projects that you can notice that they are full or love and care. I love especially those that pay attention to kids, with colorful designs, perfects to decorate a childs bedroom. Here I show to you some ideas that you can buy or DIY.
BIKE AND NAME STRING ART
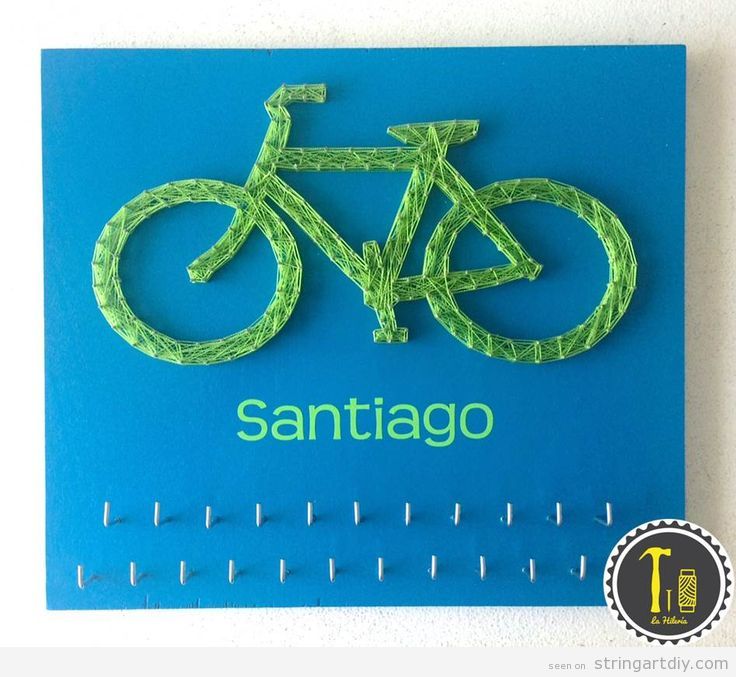
If your son or daughter loves bikes, this String Art with a nice bicycle and his name is perfect. Notice that there are some pins on the bottom to hang whatever you want.
SAILING BOAT STRING ART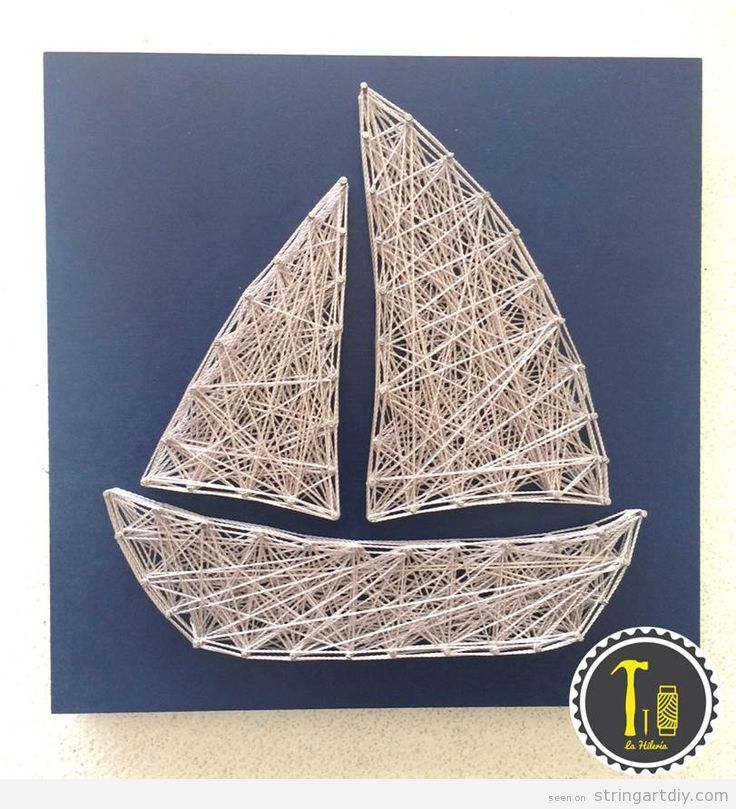
It’s amazing go to the beach and watch sailing boats on the sea, right? When I was a little girl, I enjoyed this moment to much! So a sailing boat String Art could be nice to decorate a themed kid bedroom.
CROWNS AND NAMES STRING ART
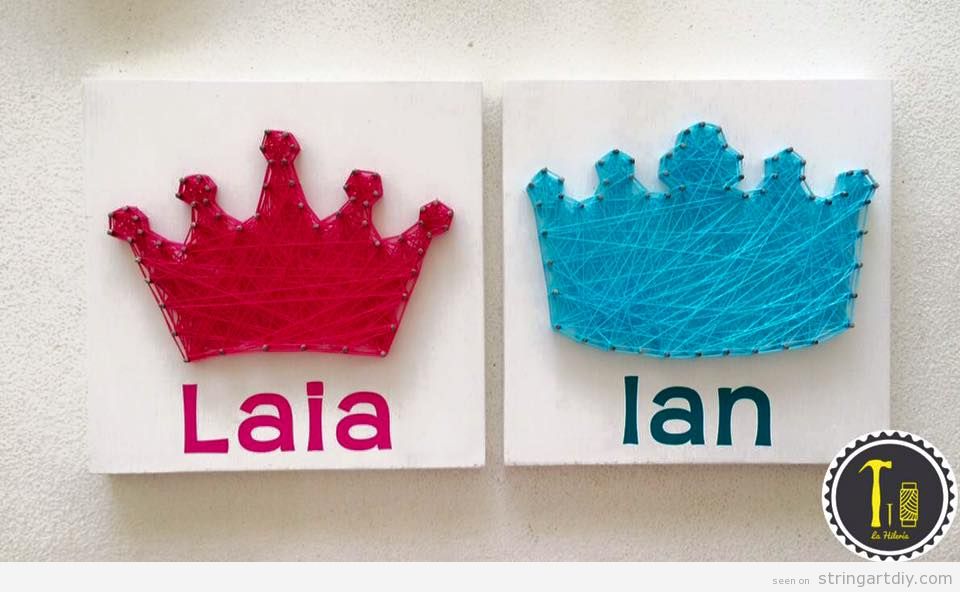
If you think that your daughter is the princess or already the queen of the house and your son is the little prince or the king of the house, these crowns and names String Art is perfect for them!
FAMILY AND HEART STRING ART 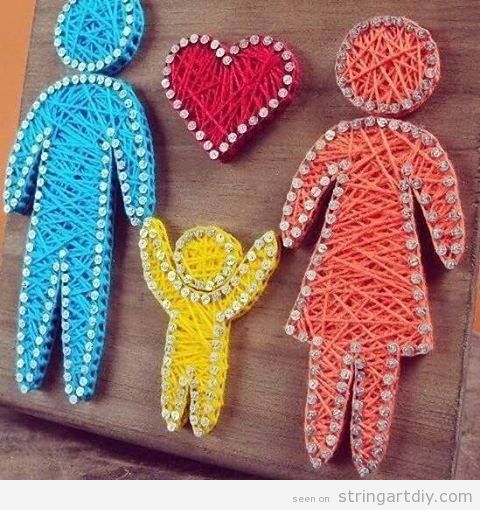
Oh, really cute design! You can portrait love family with this simple String Art. Think that there are a lot of kind of families, like a single mom or dad, two dads, two moms, etc… so open your mind and make different designs.
SMALL PLANE STRING ART
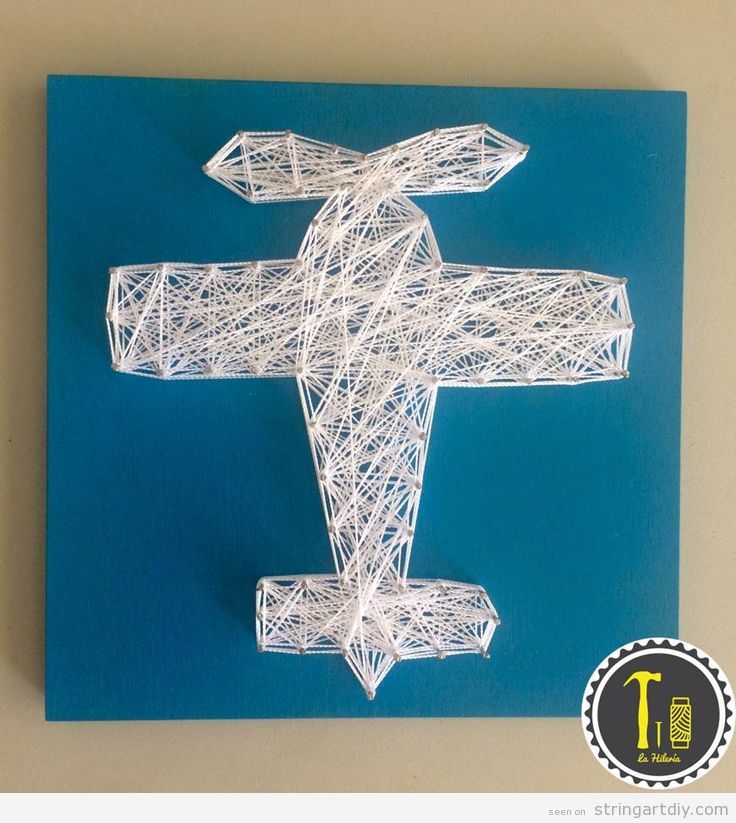
If instead of bikes or boats, your kid are obsessed with planes, this small plane or light aircraft made with white strings and with this amazing and intense blue background, it’s perfect for him or her.
Have you liked these String Art Designs for kids? If so, please, comment or send us pictures to our social networks. Thanks for reading this blog and see you soon!
Some people are literally attached to their glasses, maybe because they need it or maybe because it’s trendy and it’s an important key of their look. It it’s also possible that they are optometrist or own a Eyeglases Store.
If you want to offer them a great handmade present to decorate their room, office or their shop, take a look to these glasses String Art because they are amazing!
POP STRING ART GLASSES
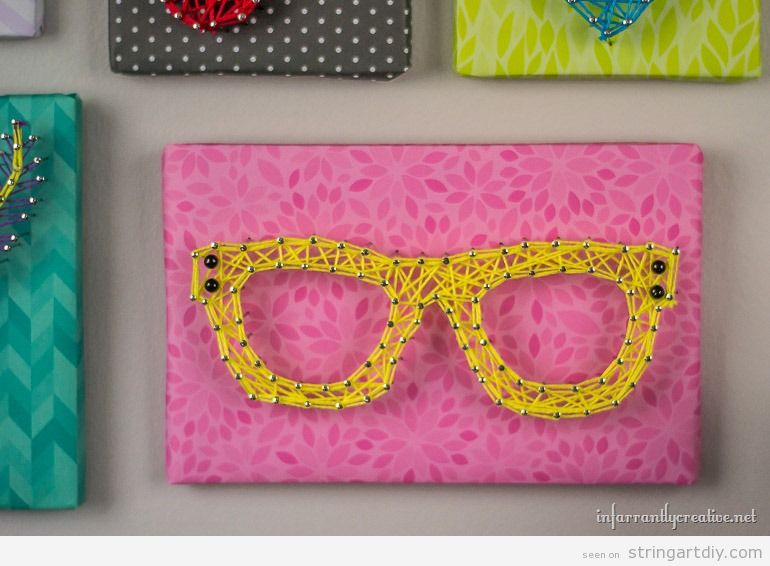
I really love this String Art made by Infarrantly creative because it’s kind of a Pop Art style and the way it mixes the pink pattern background and the yellow of the glasses.
RED GLASSES STRING ART
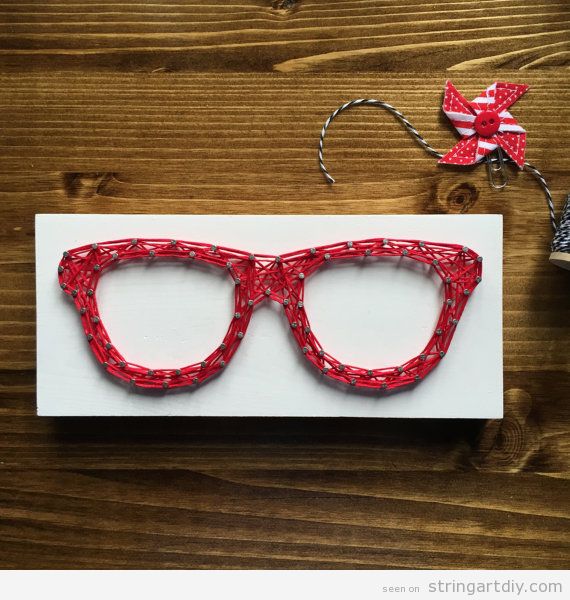
These red glasses are so adorable! It has been created by TheHonakerHomeMaker and you can buy it on Etsy Shop.
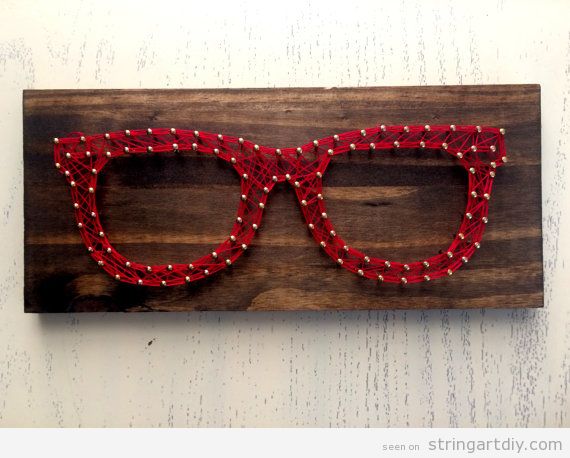
These ones with a dark wooden background are even more beautiful! I really like red glasses. Actually, I wear them 🙂 This String Art is made by 1000Strings and you also can buy it on Etsy.
BLUE STRING ART GLASSES
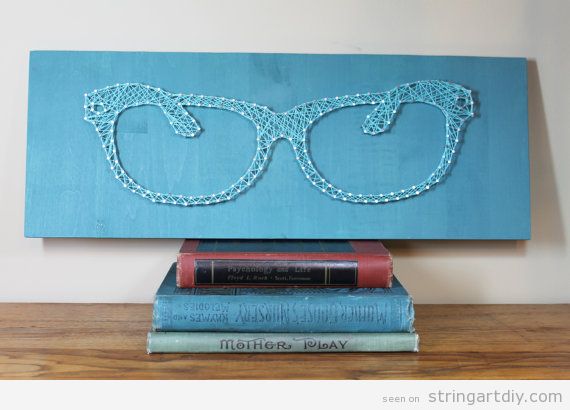
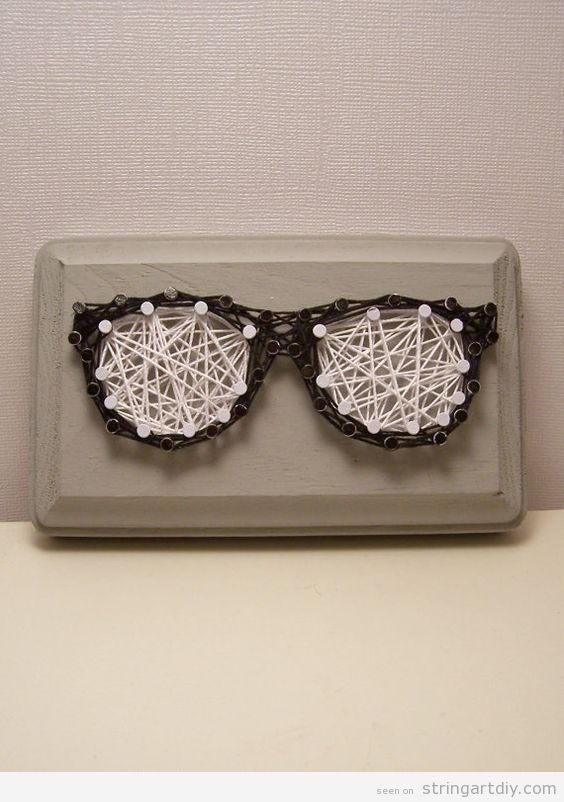
Blue background with white threads it’s a nice design too. Notice that these glasses are portrayed from the back and we can see the arms. This one is by StringArtTemplates and it’s avaliable on Etsy.
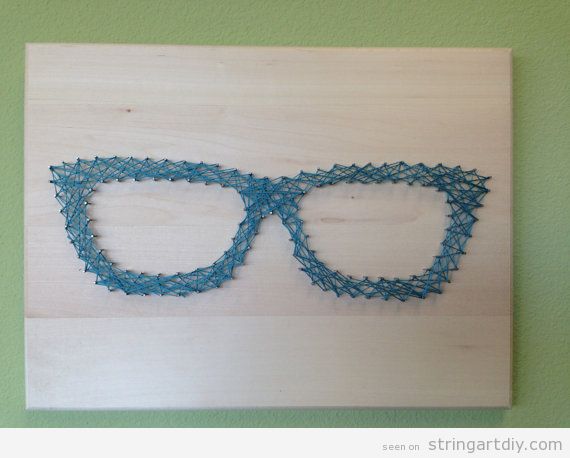
This simpler and minimal blue design by HeartStringsByJoyce it’s algs a nice option. Notice that the light wooden combines great this the blue.
HARRY POTTER STRING ART GLASSES
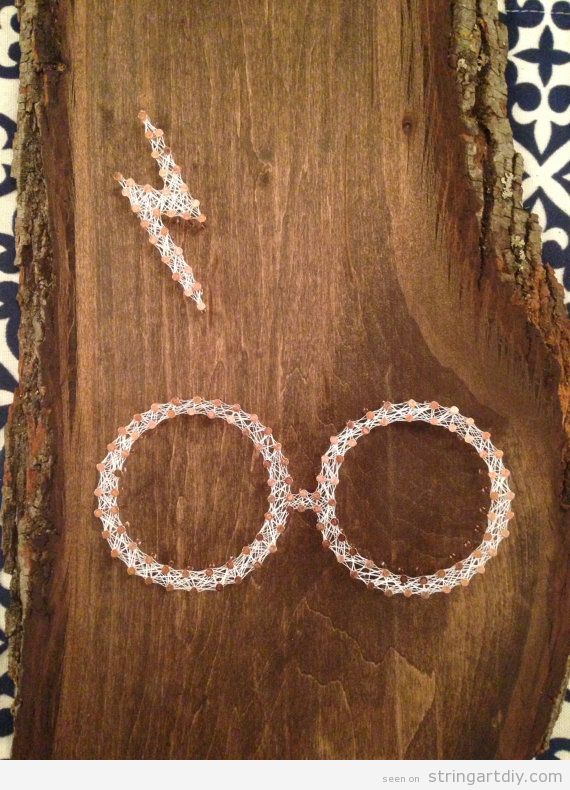
Maybe you or your friend are a Harry Potter Fans and really would love a Harry Potter famous glasses String Art. You can make it or you can buy it at: thehappytaco
RAY-BAN STING ART GLASSES
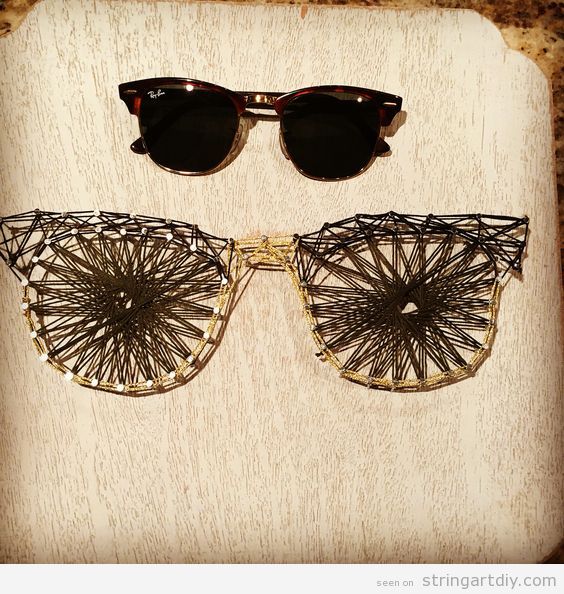
If you are a Ray-ban store owner, maybe you can make a String Art like this one to decorate your shop. Just lovely!
Have you enjoyed this post? If so, please, leave a comment and share it. Thanks!
Hey guys! One week left for Valentine’s Day, so it’s the moment of thinking about de DIY and easy gifts that we can male, as this String Ar made by Sofia Loayza. Let’s take a look to this tutorial so we can learn how to make it!
You will need these materials:
- Wooden board
- Tracing paper
- Pencil
- Patterns
- Acrylic paint
- Brush
- Cotton Thread or Wool
- Sandpaper
- Hammer
- Nail
1. The first step is to sand down the wooden board and, then, paint it in white using acrylic paint.1
2. The second step is to trace the shape on the board using tracing paper. As you can see, you have to put the tracing paper between the board and the template and dreaw again the line using a pencil. In this case it’s an elephand and the word “LOVE”
3. The third step it’s to nail the nails ord pins using a hammer all around the elephant or “Love” letters shape.
4. The fouth step is to pass the thread over the edges or borders making a little loop in each one, as you can see on the video. Remember that you can use different colours.
And that’s all! It look really nice and it’s a perfect handmade gift to give to your beloved on Valentine’s Day.
Today we want to pay tribute to one of our favourites String Art crafters: All Strung Up.
We are going to focus on the famous characters from films or cartoon series String Art because they seem fabulous to us, but we encourage you to take a look to all the String Art that All String Up made, as animals, names, inspirational words, etc.
Let’s see some handmade String Art inspired in a few lovely characters!
BABY SIMBA STRING ART
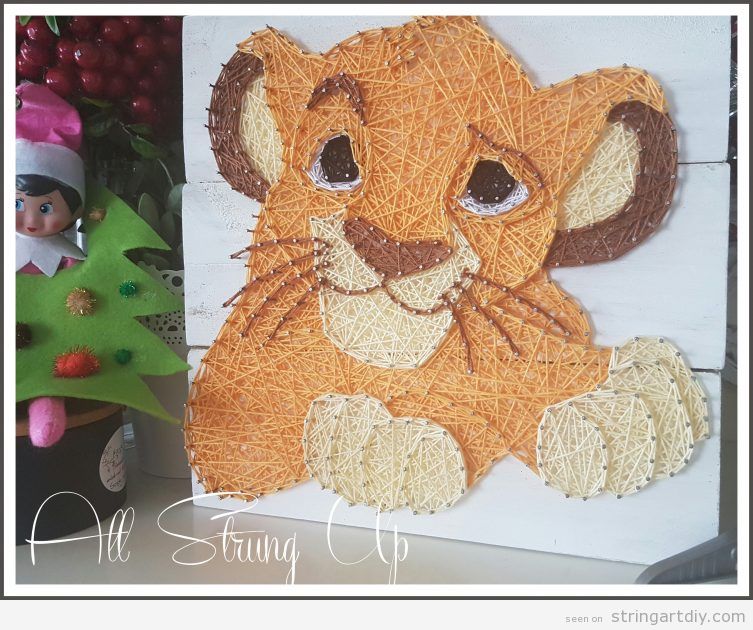
So, so, so lovely this baby Simba Stirng Art… we can’t add anything because it’s perfect.
HARRY POTTER CHIBI STRING ART
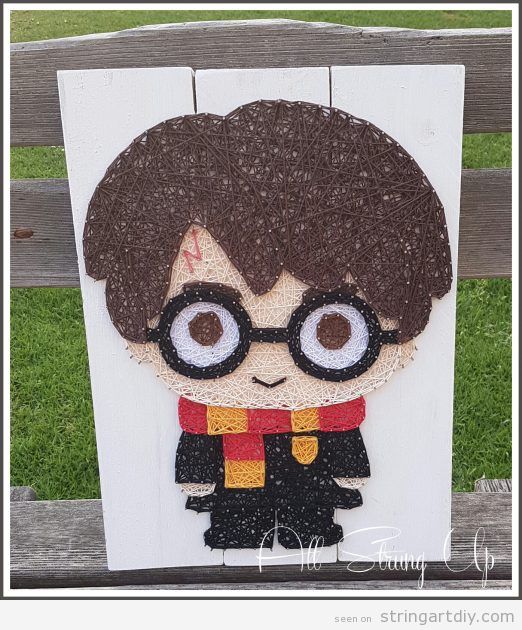
“Chibi“ is a Japanese slang word meaning “short or small person” and, as you can see, it’s a very cute way to portray a character as Harry Potter.
ADVENTURE TIME: JAKE AND FINN STRING ART

Have you watched “Adventure Time”? It’s a very unusual and crazy cartoon tv serie and we recommend it so much! The characters, as Jake and Finn are awesome, so this String Art it is.
SNOOPY ON THE DOG HOUSE STRING ART
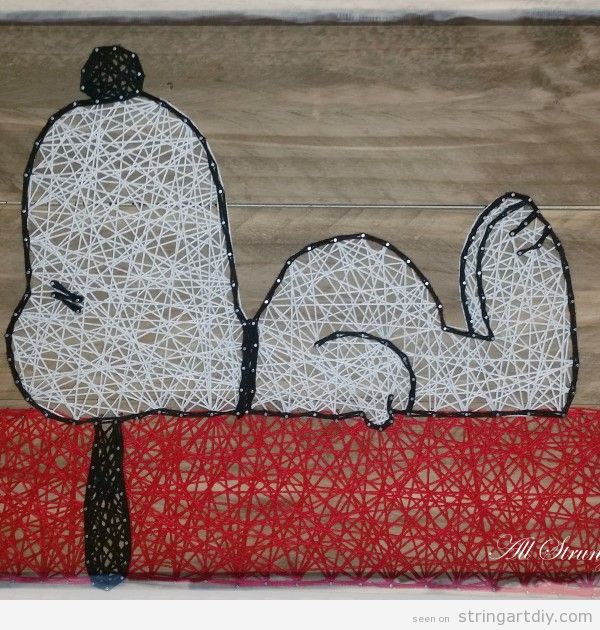
Snoopy laying down on the dog house roof it’s so legendary! This String Art it’s perfect do decorate a child bedroom.
ELMO SESAME STREET STRING ART

I would put this Elmo from “Sesame Street String Art” in a some of “nostalgic room” full of childhgood memories, dolls and videogames. If not, just in my office would look nice!
BATMAN AND JOKER STRING ART
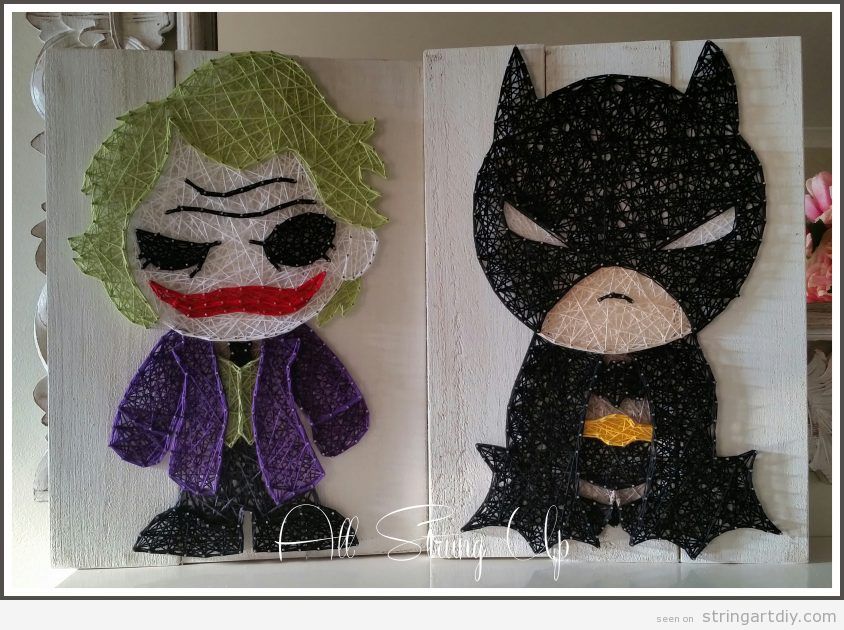
Batman and Joker are my favourite antithetical characters. This way to reprsent them, also in a “chibi” style it is super cute.
Have you like them? Remember that you can buy these Strign Arts on the All Strung Up Shop! Have a nice week and please, follow us on the social networks as Twitter @stringartdiy and Facebook String Art. See you!
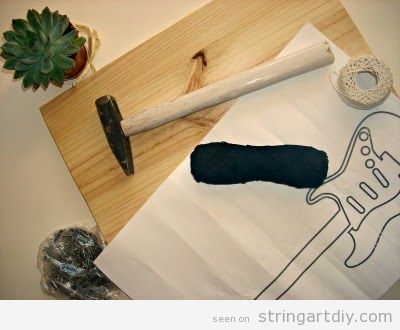
Hi, guys! Today we have find this amazing Electric Guitar String Art made by La Buhardilla and we want to share the process with us in order you can learn how to make it.
As usual, you will need the following materials: a wooden board, a hammer, scissors, nails, threads (black and white) and a template.
First of all, here you have the templeate, so you can download it:
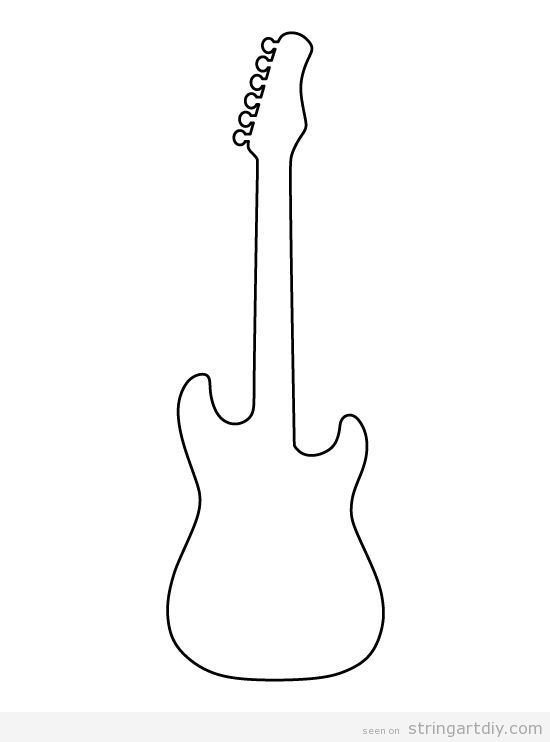
You can download a higher version of this template to print it in this link: Download the pattern by Pattern Universe.
Then, we start the process, wich is almost always the same.
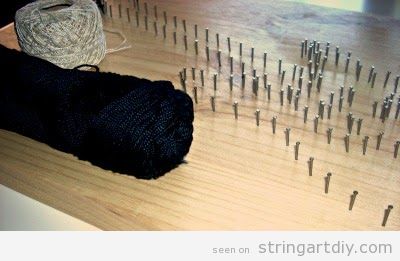
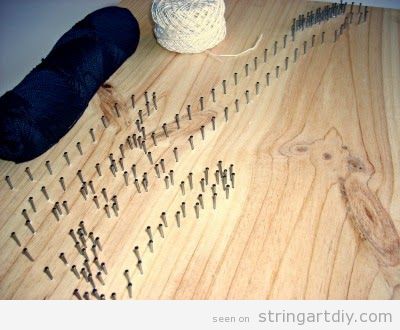
- You must put the pattern over the wooden board and, then, start to clue the nails on the shape.
2. Once you have finished, retire or remove the paper and you will have all the guitar shape and its decorations.
3. This is the moment when you start to put the threads over the nails. Make a loop around the nail heads. Pay special attention if you want to make the guitar in different colours. This one is in black and white but you could chose whatever colour you like the most.
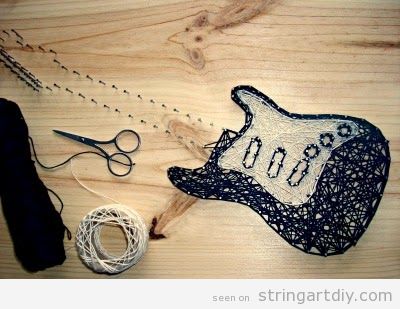
4. That’s it! Put the String Art in a wall to decorate it. This it’s also a nice handmade gift.

Have you like it? So comment and share! Thanks for reading, see you soon!
How could we say about Frozen? We suppose that you have already watched it. It’s a wonderful movie, far from the stereotyped ones that we are used to watch. All our kids are crazy about Elsa, Anna, Olaf… they can feel that they are kind hearted and they love them.
Today we want to show you 5 String Arts inspired in this movie. Here we go!
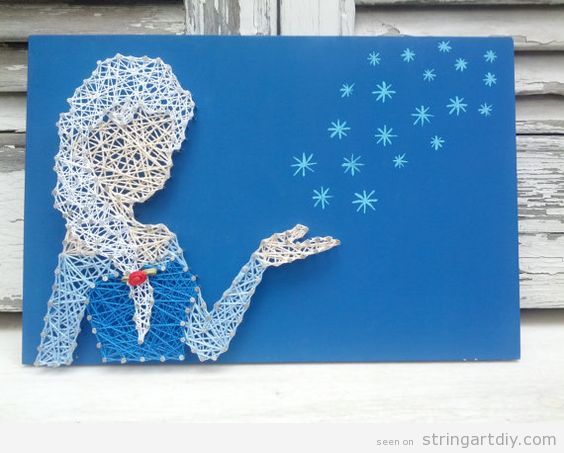
ELSA STRING ART
Elsa is the main character and all the girls want to be her and they often are dressep up or disguised like her. Here you have a Elsa wonderful String Art where she are making her magic gesture that creates snowflakes. The background in blue is a nice option.
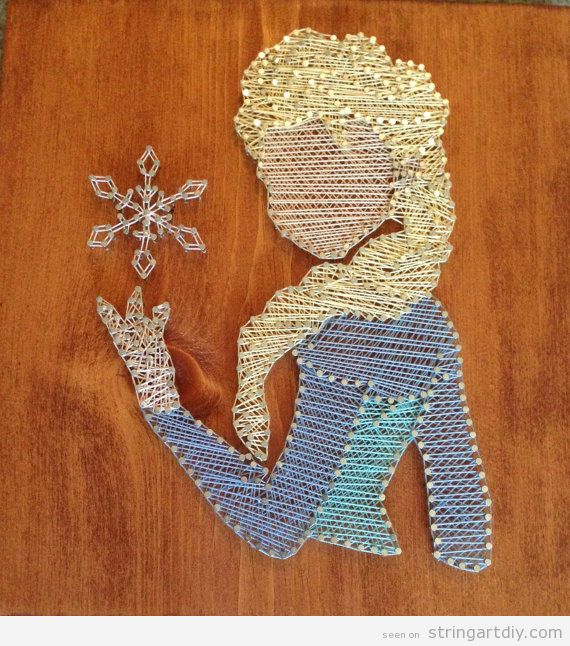
 Source: Derannoula
This Elsa String Art is stunning because the artist has added some flat head pins that makes the outline and add some sparkles to her hair and body. In addition, the snowflakes are very well done. Lovely!
ANNA STRING ART
Anna is Elsa’s sister and we could consider her also a main character in the film because is the one who are really worried about Elsa and tries to save her from the ostracism she are suffering.
This Anna String Art is simpler but still beautiful.
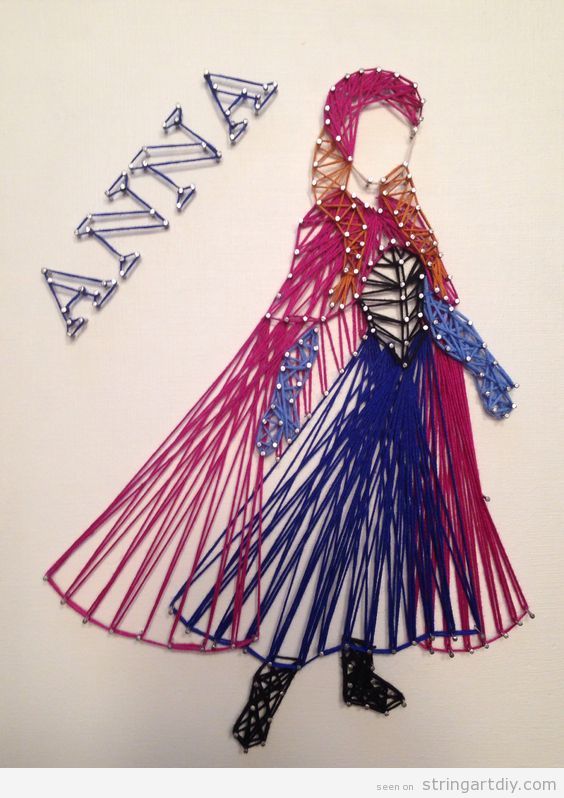
Source: Pinterest
OLAF STRING ART
Olaf is the kindest and funiest character in “Frozen” and he takes our hearts from the very beginning. Look at these two wonderful Olaf String Art that can transmit his personality and his joy.
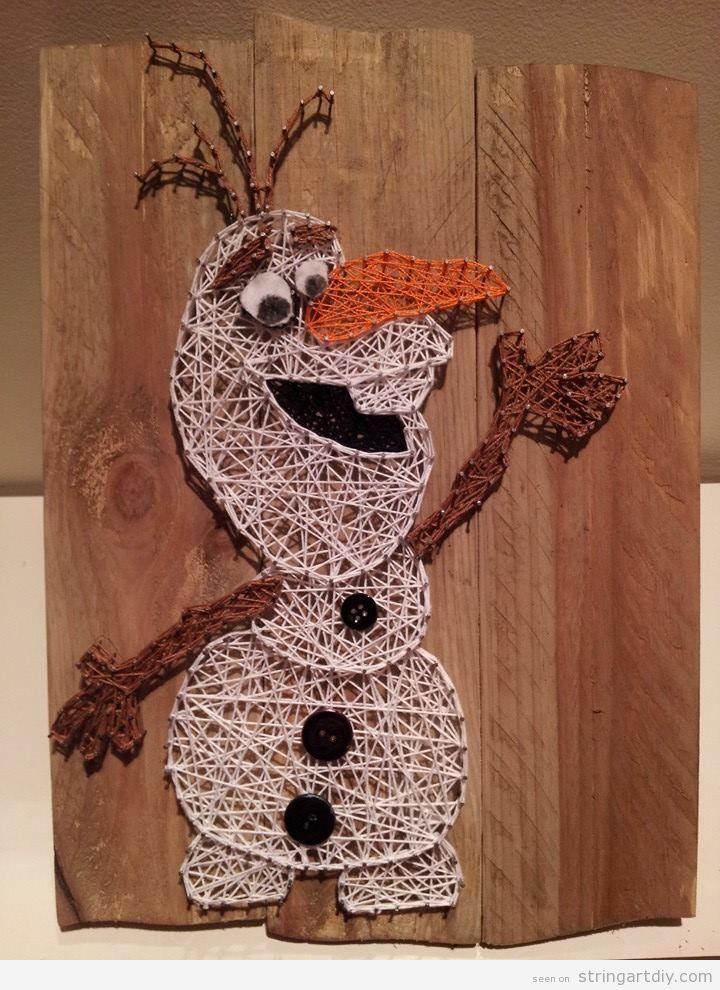
Source: All strung up
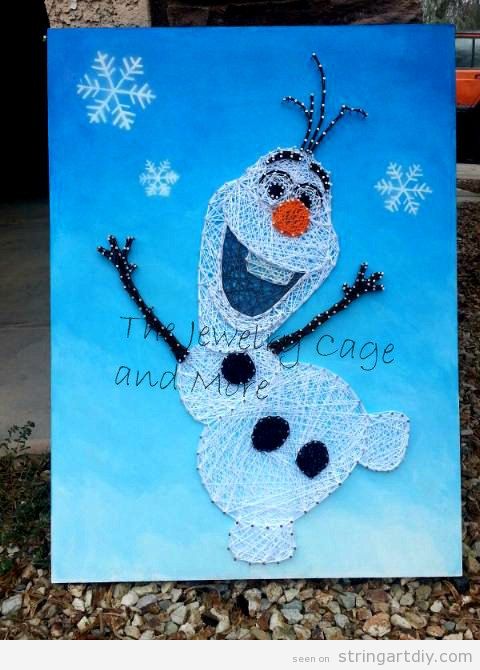
Source: The Jewlery cage and more
Have you loved these Frozen String Art? It could be a really good handmade gift to give to a girl or boy. It would be a nice piece to decorate their rooms also. You can made them yourself of buy in the source links if you prefer. Enjoy it!
Ho, ho, ho! We are already getting in the mood for Christmas so we are fancy making Chritmas String Art DIY decorations and ornaments for our home. We have selected 5 projects that we have loved very much, so here we go!
STRING ART CHRISTMAS TREE ORNAMENT
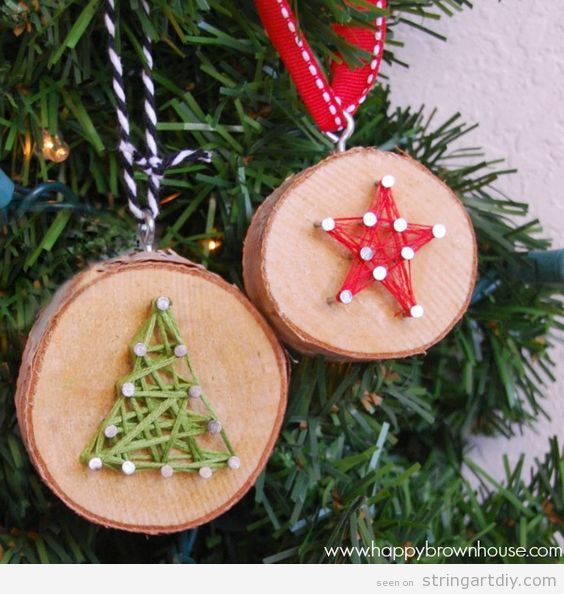
As a Christmas Tree ornament you can make this wonderful wood slice string art. We can draw a tree, a star, a snowflake… whatever you like the most. You can get more information about this DIY by visiting the web Happy Brown House
STRING ART ELF LEGS
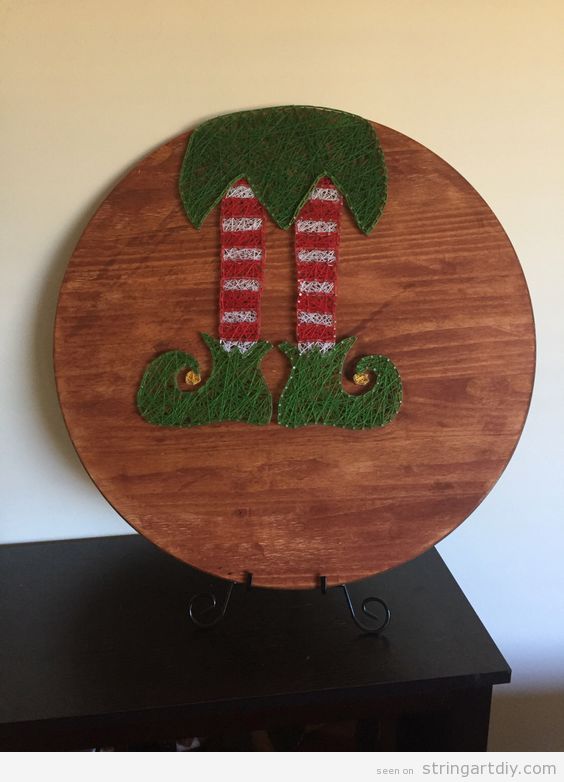
We think that these elf legs are so cute! As we can see on the picture above, it’s a complexe String Art on a round wooden board. It is a little difficult to ake, so if you can’t reach a good result, you can buy it at Etsy VotreVieEnRose shop.
STRING ART CHRISTMAS, GRINCH HAND
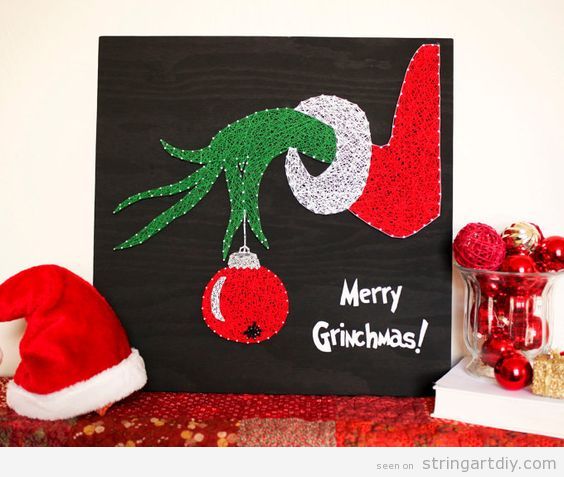
If you don’t like Christmas Time very much and you feel like if you were The Grinch, this Merry Grinchmas String Art is perfect for decorate your home. This projecis is made by EveryStringAttached.
STRING ART CHRISTMAS, SNOWFLAKE
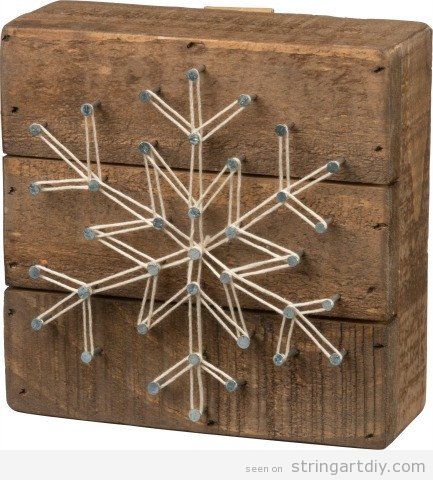
Another nice Christmas ornament to decorate your house could be this snowflake String Art on a thick board, traead as if it were antique. You can make it yourself or by it at Bring it Home.
STRING ART CHRISTMAS TREE
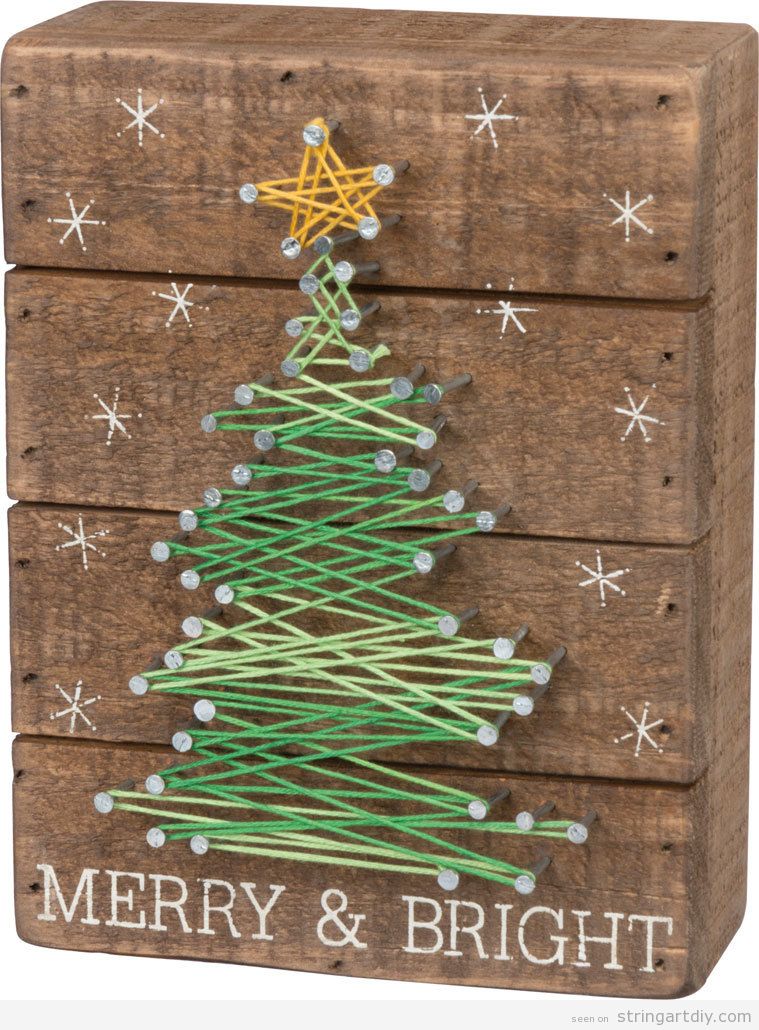
Finally we want to show you this wonderful String Art Christmas Tree, also made on a thick wood board. It would be even more beautiful if you draw some stars or words, as merry & bright. Also you can do it yourself or buy it at California Seashell.
Have you enjoyed these projects? If so, please, share with your friends on your social networks and send us pictures once you have finished your String Art DIy Projects. Thanks!
Heeey! If you are looking for an easy String Art for begginer or for make with kids and teenagers, maybe this video made by Diego Rojas will help you.
As you can see, you only have to nail the nails in a wooden board following the line of a circle. We recommend to print the shape or draw it using a pencil and then pin the nails around it. After that, you must cross the threads in the order you can see on the video. Then, repeat the process twice using some different colours and that’s it.
An that’s all! You will have a perfect handmade project to decorate a wall.
Recent Comments