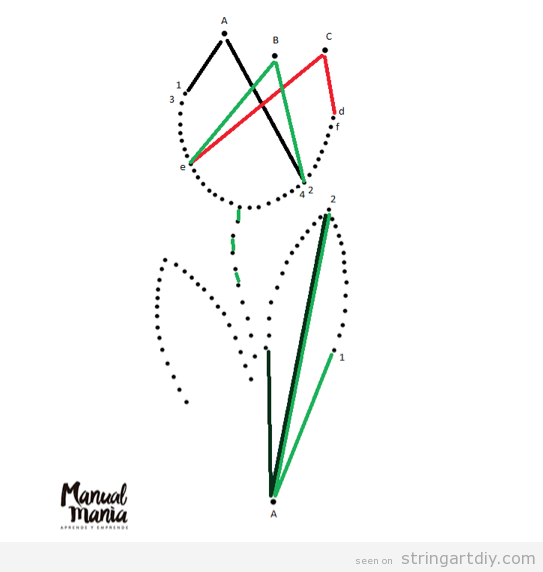
Steps
Hey guys! One week left for Valentine’s Day, so it’s the moment of thinking about de DIY and easy gifts that we can male, as this String Ar made by Sofia Loayza. Let’s take a look to this tutorial so we can learn how to make it!
You will need these materials:
- Wooden board
- Tracing paper
- Pencil
- Patterns
- Acrylic paint
- Brush
- Cotton Thread or Wool
- Sandpaper
- Hammer
- Nail
1. The first step is to sand down the wooden board and, then, paint it in white using acrylic paint.1
2. The second step is to trace the shape on the board using tracing paper. As you can see, you have to put the tracing paper between the board and the template and dreaw again the line using a pencil. In this case it’s an elephand and the word “LOVE”
3. The third step it’s to nail the nails ord pins using a hammer all around the elephant or “Love” letters shape.
4. The fouth step is to pass the thread over the edges or borders making a little loop in each one, as you can see on the video. Remember that you can use different colours.
And that’s all! It look really nice and it’s a perfect handmade gift to give to your beloved on Valentine’s Day.
The result is amazing! isn’t it? It turns out a great craft to decorate a wall!
Source: Loo
Here you have a video to learn two String Art techniques step-by-step. As you can see, it’s perfect to give as a Valentine’s present. One of them is the word “Love” written with pita fibre, but you can also use cotton or wool thread.Obviously, you have to use nails too, as well as wood or thick cardboard for the base and a pattern.
The other one is just a heart shaped String Art, but still different and lovely.
Enjoy it!
Source: Andrea Vlogger Gt
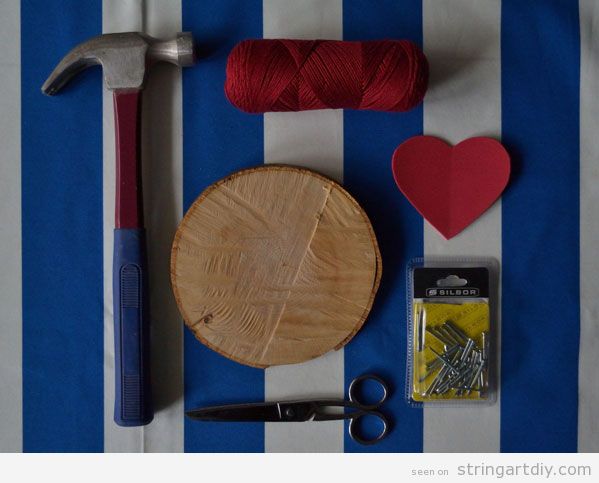
To make this wonderful heart shaped String Art you will need:
– Hammer
– Red String
– Heart Pattern (made by felt, foam or cardboard)
– Tree or trunk slice
– Nails
– Scissors
After that, you need to put the felt heart shaped pattern on the slice and clue the nails all over it.
Then, you just need to pass or cross the thread and fix it on the nails in multiples directions and you will have this wonderful piece to decorate a room, a cafe, a wedding or whatever you want.
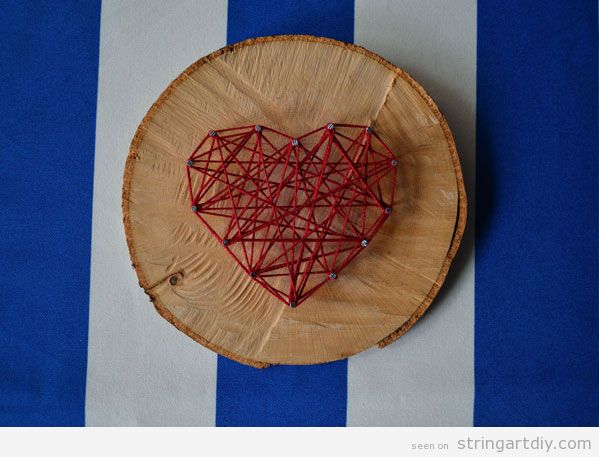
Source:_ Salacadula
We hope that this tutorial by eleFANTASIAndo is useful to you.
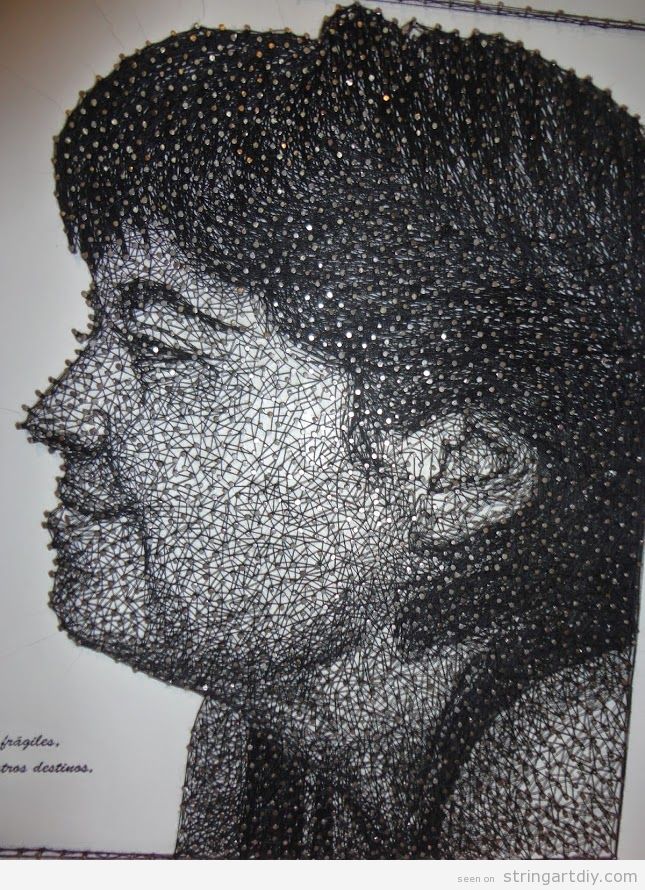
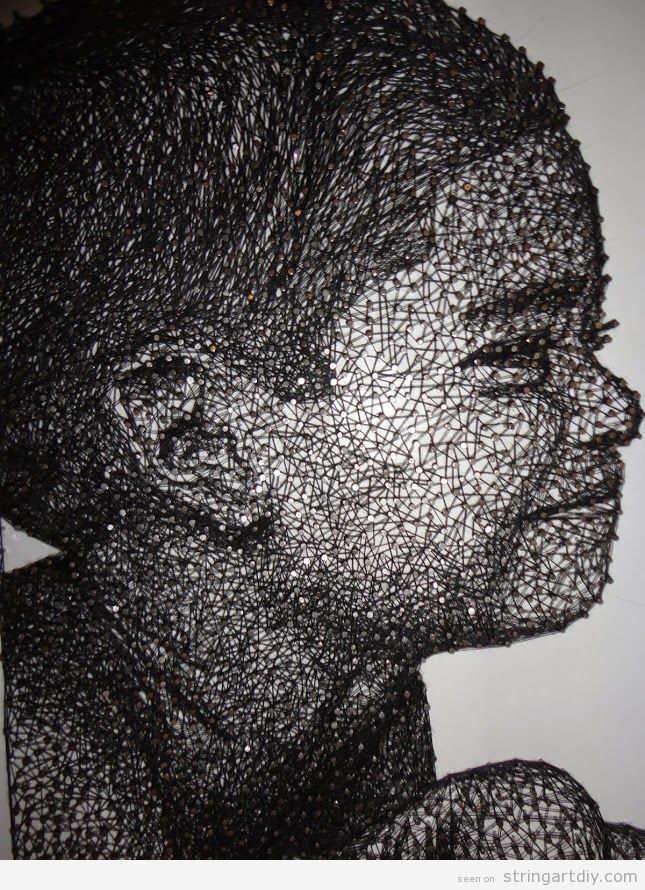 This is an awesome work by Israel Narváez Romero – Artísta Exponline. Two really awesome mom-son portrait made with strings and nails. Lovely…
via jvothuy