Learn
Creativity is infinite and boundless, so we keep searching and finding new designs to make plenty of String Art projects. Today we want to show you this kind of challenge in Versus Youtube Channel where two girls try to make a String Art: one of them creates a Facebook Thumbs Up symbol and, the other one, creates the “Versus” word. Let’s take a look to the process:
As you can see, the symbol has won the challenge and it looks a little bit better than “Versus”, so let’s focus on this one. First of all, you need a thumbs up template:

You can download this pattern in full size to print in this link: Thumbs Up Template
Then, you put the pattern on the board and pin the nails over the shape using a hammer. Once you finished, remove the pattern and start to cross the threads over the nails. We recommend you to use three tones of blue, one darker to the edges, one lighter to the cuff and one even lighter to the hand. Add some red to the cuff button!
We hope you like this project and enjoy making them! This is a nice low cost project to decorate your bedroom, so let’s go.
Hey guys! One week left for Valentine’s Day, so it’s the moment of thinking about de DIY and easy gifts that we can male, as this String Ar made by Sofia Loayza. Let’s take a look to this tutorial so we can learn how to make it!
You will need these materials:
- Wooden board
- Tracing paper
- Pencil
- Patterns
- Acrylic paint
- Brush
- Cotton Thread or Wool
- Sandpaper
- Hammer
- Nail
1. The first step is to sand down the wooden board and, then, paint it in white using acrylic paint.1
2. The second step is to trace the shape on the board using tracing paper. As you can see, you have to put the tracing paper between the board and the template and dreaw again the line using a pencil. In this case it’s an elephand and the word “LOVE”
3. The third step it’s to nail the nails ord pins using a hammer all around the elephant or “Love” letters shape.
4. The fouth step is to pass the thread over the edges or borders making a little loop in each one, as you can see on the video. Remember that you can use different colours.
And that’s all! It look really nice and it’s a perfect handmade gift to give to your beloved on Valentine’s Day.
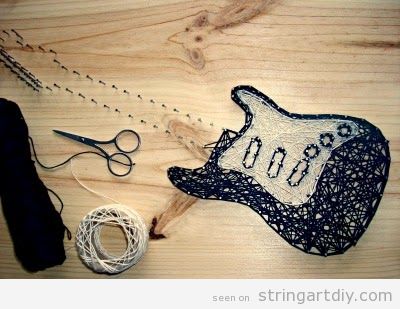
Hi, guys! Today we have find this amazing Electric Guitar String Art made by La Buhardilla and we want to share the process with us in order you can learn how to make it.
As usual, you will need the following materials: a wooden board, a hammer, scissors, nails, threads (black and white) and a template.
First of all, here you have the templeate, so you can download it:
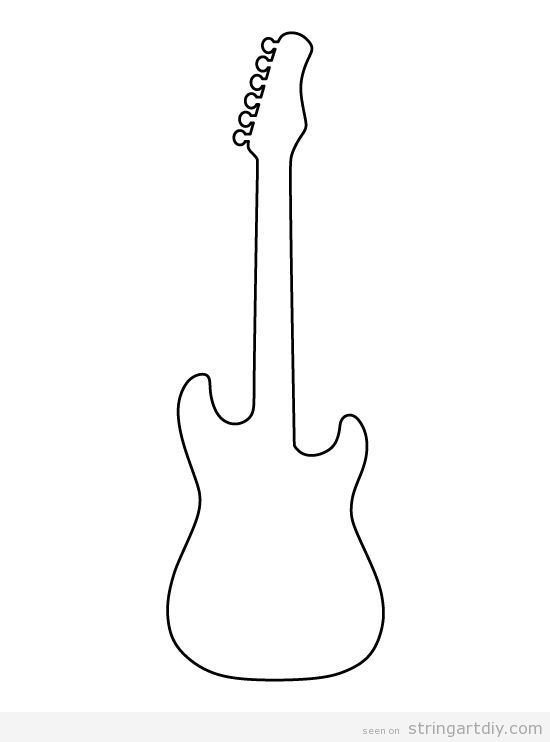
You can download a higher version of this template to print it in this link: Download the pattern by Pattern Universe.
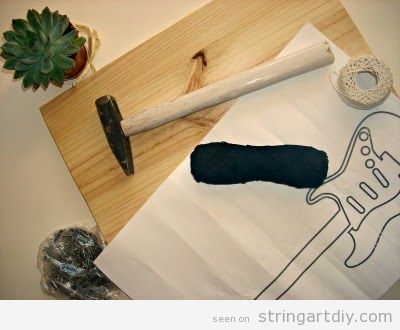
Then, we start the process, wich is almost always the same.
- You must put the pattern over the wooden board and, then, start to clue the nails on the shape.
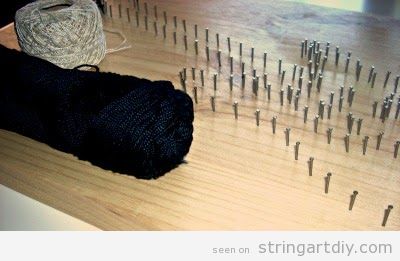
2. Once you have finished, retire or remove the paper and you will have all the guitar shape and its decorations.
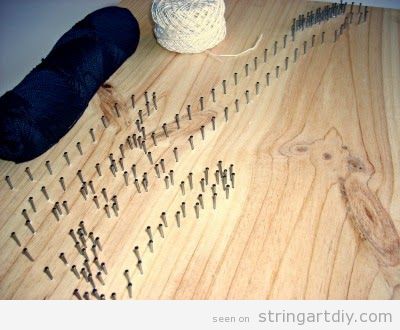
3. This is the moment when you start to put the threads over the nails. Make a loop around the nail heads. Pay special attention if you want to make the guitar in different colours. This one is in black and white but you could chose whatever colour you like the most.
4. That’s it! Put the String Art in a wall to decorate it. This it’s also a nice handmade gift.

Have you like it? So comment and share! Thanks for reading, see you soon!
Heeey! If you are looking for an easy String Art for begginer or for make with kids and teenagers, maybe this video made by Diego Rojas will help you.
As you can see, you only have to nail the nails in a wooden board following the line of a circle. We recommend to print the shape or draw it using a pencil and then pin the nails around it. After that, you must cross the threads in the order you can see on the video. Then, repeat the process twice using some different colours and that’s it.
An that’s all! You will have a perfect handmade project to decorate a wall.
Lately I’m quite obsessed with mandalas and its geometric shapes and repetitions. I really have a good time drawing them. It’s very relaxing and creative. In addition, once you have the mandala drawn, colored or made, it’s a nice piece of decoration and, if you love meditate or you practice yoga, it’s a good point to focus your mind while you try to reach the Nirvana.
Today we have searched a good tutorial to show you how to make a beautiful Mandala String Art full of colors. Here you have a nice video made by Diônatan Bertelli
As you see, you will need:
- Round shaped wooden board (painted in black, white or the color you like the most
- Nails
- Hammer
- White, soft purple, dark purple, soft or pastel green and turquoise threads.
- Picture or Frame Hangers.(
The process is simple and I think that you already know it, but as you can see on the video, it’s about to tie the thread into one nail and its opposite and repeat it until you have finished. It’s better to watch the videotutorial to be sure that you’re doing it right.
If you like it, share the post in your social networks and spread the knowledge 🙂
Do you know Poros? He is an adorable character from the videogame “League of Legends”. Well, today we want to bring to you this videotutorial (sorry, it’s in Spanish) to learn how to make a Poros String Art with, pay attention, it includes LED lights and the result it’s amazing!
To make this, you will need:
- Wooden board, 30x3o centimetres
- Nail
- Hammer
- Threads
- Pattern
- Led strips
- Transformer
- Wire
- Scissors
- Soldering iron
- Tin
Then, you have the print or draw the pattern and clue the nails, as we ussually do. Remove the pattern and place the led strips where you want them to be. The wire process it’s better to watch on the video than reading the instructions here. Once the led strips are connected, start to tie the therads over and across the nails.
Once finished, turn on the led lights and voilà, here you have the Poros illuminated! As you can see, the piece could serve as wall lamp and it could be a nice lamp decoration for a kid or teenager beedrom.
What do you think? Do you love it? Send us pictures of your projects to our Twitter @stringartdiy or to our Facebook String Art DIY
Thanks to 1dalanyo for sharing with us this amazing tutorial and see you soon 🙂
Andrea Vlogger Gt show us in this video 2 ways to make a String Art DIY, the “inverse way”, filling with thread all the space left outside the main figure, in this case, a heart and, on the other side, the classic way, filling the figure, in this case, the word “love”, written whith a lovely handwritting typo.
As you can see, she paints the board in blue and in pink. The thing I like the most is that she uses jute or sacking thread to make this project and it looks really great. Don’t you think so?
It’s a really lovely handmade gift to your boyfriend or girlfriend, no matter if it is because of your love, your anniversary or Valentine’s Day.
Well, as always, we engourage you to send your String Art project to us via Twitter @stringartdiy and Facebook String Art DIY!
Thanks to ElefantImGlashaus for showing us how to make this super cool Superman Logo String Art!
As you can see, it’s an advanced craft. First of all, she cut the logo shape on a wooden board and you need some special tools to make it properly.
After that, she paints the board in blue and starts the process of creating the “S” of Superman Logo String Art with red and yellow threads.
That’s a nice piece of craft to give to your brother, husband, boyfriend or even your dad as a handmade gift.
Do you like it? Make it and share it! 🙂
Wow, it’s amazing this hyper realistic portrait made usting String Art technique! As you can see, you have to start with a beautiful pic and then clue a lot of nails aorund the most important shapes and then, use green thread to mark the most important lines. Pay attention: this video is subbed in english, so you will not have problems with the instructions.
As you can see, only the flower is in a gradient orange. The girl is in black and white gradient. It’s and advanced level project, so if you are a begginer, you must start with an easier idea.
I just love it. It’s a beutiful idea, a handmade gift for a very important or special person to you.
Look more works at Israel Narváez Romero Instagram.
In this video, fashionwithpassion show how to make Sring Art letter. In this case, is the letter R, but you can choose whatever you want! This makes a perfect gift for a friend or a nice piece for room, shop or cafe decor.
I hope you enjoy it! Please, show us your crafts by sending your Twitter @stringartdiy
xx!