Tutorial

Mountain String Arts are an ideal choice for decorating your living room with the taste of nature and traditional artwork. There are several ways to draw a mountain with threads: one is more realistic, with complex shapes and shadows and another simpler, with geometric shapes that give it the appearance of abstract mountains.
Here are two mountain templates, one realistic and the other geometric. Afterwards, we will see a step-by-step tutorial to learn how to make a realistic mountain String Art, as it is more complicated. Finally, we show you 10 String Arts mountain designs, some of them realistic and others abstract, so that you can be inspired by their designs and make your own DIY.
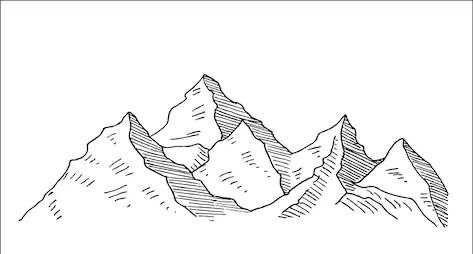
MOUNTAIN STRING ART PATTERN
As mentioned above, the first thing to do is to download and print the Mountain String Art template of your choice. Here are two examples. They’re easy to draw, so if you don’t have a printer, you can take them as a reference and draw their shapes on top of the piece of wood or canvas.

TUTORIAL STEP BY STEP
Since making a realistic Mountain String Art is more complicated, here’s a step-by-step tutorial by HANDMADE STUDIO Golden Sun so you can easily follow the process. As you can see, he draws the mountain directly with a pencil on top of the wood, but you can put the paper and nail the nails on top. The most difficult part is to make the shadows with threads, they don’t have to be black, they can also be white, so stay tuned.
MOUNTAIN STRING ART DESIGNS
Now that you know how to draw mountains and how to make String Art, it’s time to show you different Mountain String Art designs so you can decide which style you like best. Let’s take a look:
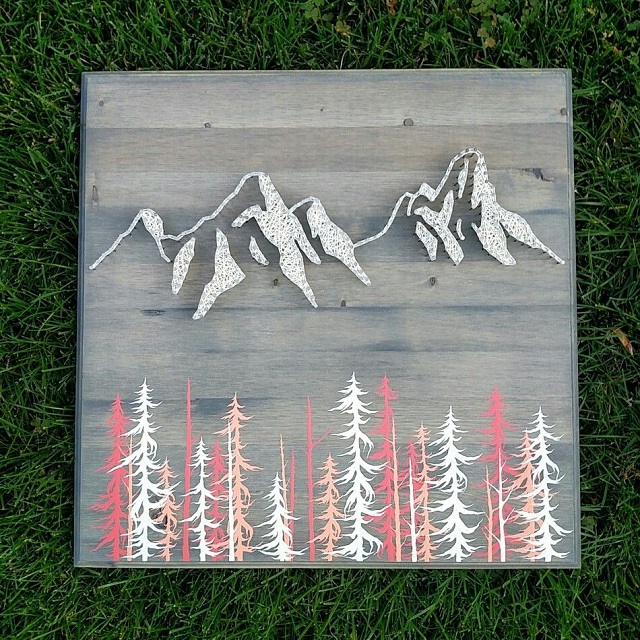
This white mountain String Art design on grey wood with red and orange trees is simply beautiful.

Via Distant Realms
The mountains in white thread on a background of dark wood look very good, as you can see. They look like snowy mountains.

Via Bigantic
In this other mountain String Art we see again the design in white thread on a dark wood background, but with the novelty that it also adds a white tree and a bear in the foreground.

And still another design similar to the previous ones, but with different size and a lighter wood color.
Via byHANDstringart
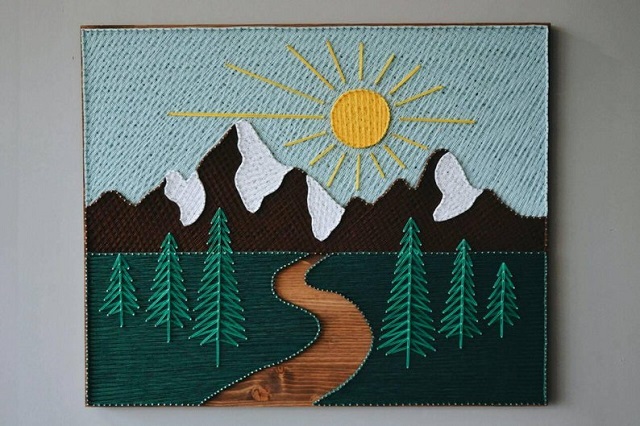
We changed the design for one where the mountains appear flatter and more colorful, as if it were a drawing made by children. We love the colors, as well as the road and trees in the foreground.
Via StencilsStudios
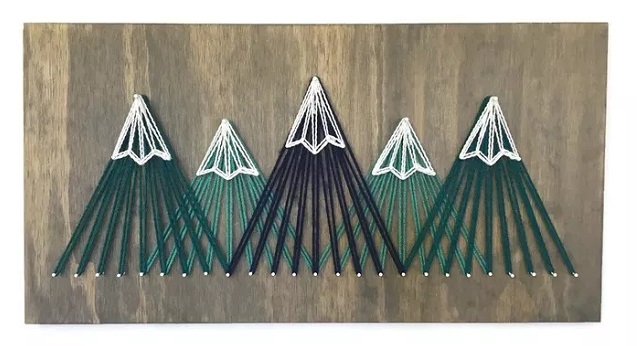
We entered fully into a more geometric and abstract style of drawing mountains Strin Art, with triangles only. Notice also how they has pulled the String Art threads, straight and vertical, which adds a curious height effect to the mountains.

In this design they have also drawn mountains with triangles and with depth effect. What stands out is that they have added a nice painted lettering that says “Adventure Awaits”
Via Krisjsmitty
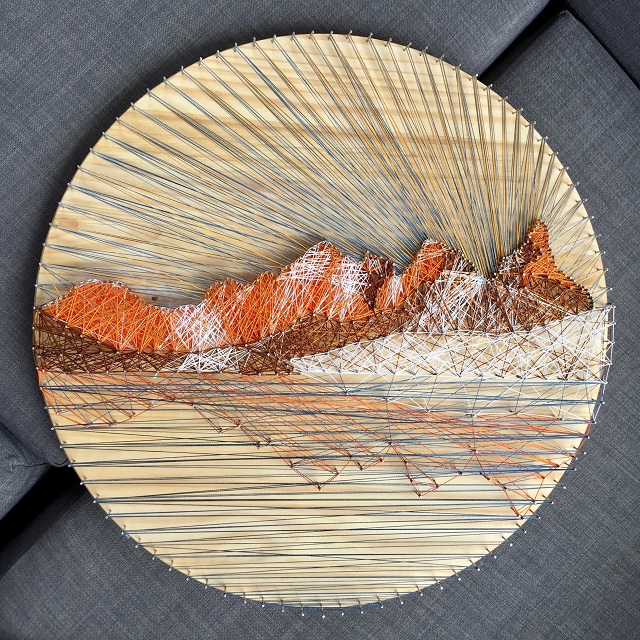
We love this mountain string Art especially for the colors that it has chosen, different to the previous ones, in orange and brown tones, that give it an air of autumn. Notice also that they have added the reflection of the mountains below and it seems that there is a lake.
Via jennyweasley
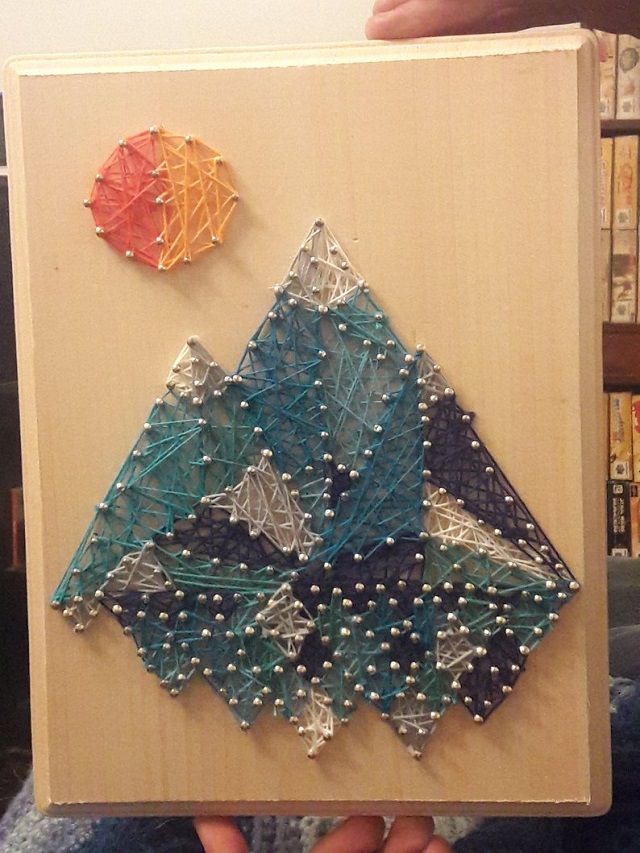
These geometric mountains in blue tones are also precious and also have their reflection in the lower part. The sun in warm tones are a good counterpoint to the composition.
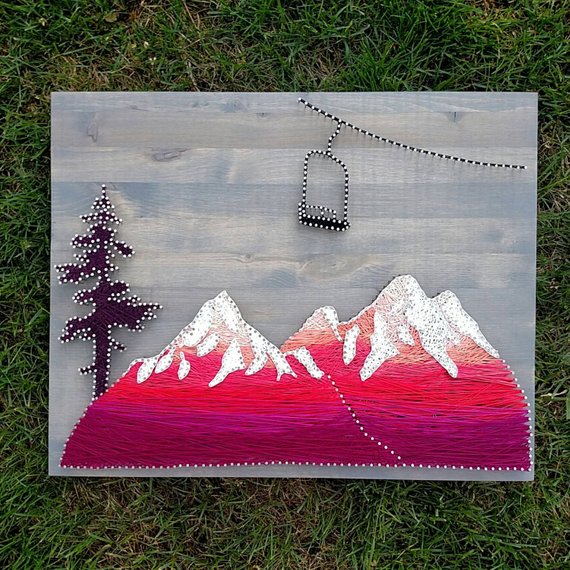
We finished with this beautiful and colorful design in which they have decided that the mountains are fuchsia, pink and white to give a more vivid effect. The chairlift on top is funny.
We hope that you liked these mountain String art Templates, the step-by-step tutorial and the 10 designs and that them has inspired you to create your own mountain string art DIY right now. Come on!
Creativity is infinite and boundless, so we keep searching and finding new designs to make plenty of String Art projects. Today we want to show you this kind of challenge in Versus Youtube Channel where two girls try to make a String Art: one of them creates a Facebook Thumbs Up symbol and, the other one, creates the “Versus” word. Let’s take a look to the process:
As you can see, the symbol has won the challenge and it looks a little bit better than “Versus”, so let’s focus on this one. First of all, you need a thumbs up template:

You can download this pattern in full size to print in this link: Thumbs Up Template
Then, you put the pattern on the board and pin the nails over the shape using a hammer. Once you finished, remove the pattern and start to cross the threads over the nails. We recommend you to use three tones of blue, one darker to the edges, one lighter to the cuff and one even lighter to the hand. Add some red to the cuff button!
We hope you like this project and enjoy making them! This is a nice low cost project to decorate your bedroom, so let’s go.
Hey guys! One week left for Valentine’s Day, so it’s the moment of thinking about de DIY and easy gifts that we can male, as this String Ar made by Sofia Loayza. Let’s take a look to this tutorial so we can learn how to make it!
You will need these materials:
- Wooden board
- Tracing paper
- Pencil
- Patterns
- Acrylic paint
- Brush
- Cotton Thread or Wool
- Sandpaper
- Hammer
- Nail
1. The first step is to sand down the wooden board and, then, paint it in white using acrylic paint.1
2. The second step is to trace the shape on the board using tracing paper. As you can see, you have to put the tracing paper between the board and the template and dreaw again the line using a pencil. In this case it’s an elephand and the word “LOVE”
3. The third step it’s to nail the nails ord pins using a hammer all around the elephant or “Love” letters shape.
4. The fouth step is to pass the thread over the edges or borders making a little loop in each one, as you can see on the video. Remember that you can use different colours.
And that’s all! It look really nice and it’s a perfect handmade gift to give to your beloved on Valentine’s Day.
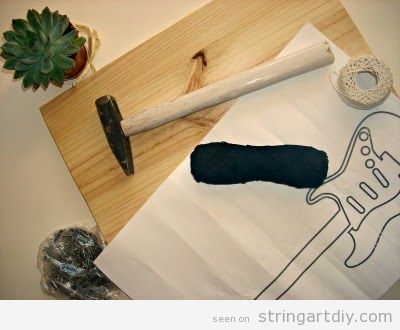
Hi, guys! Today we have find this amazing Electric Guitar String Art made by La Buhardilla and we want to share the process with us in order you can learn how to make it.
As usual, you will need the following materials: a wooden board, a hammer, scissors, nails, threads (black and white) and a template.
First of all, here you have the templeate, so you can download it:
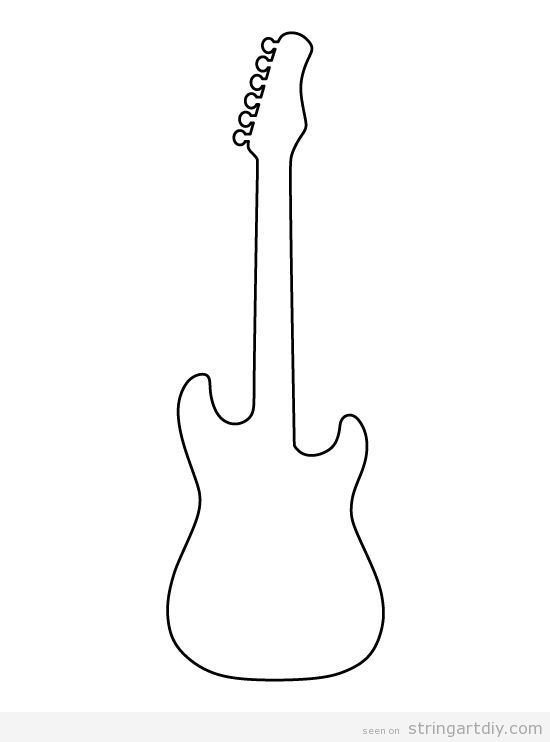
You can download a higher version of this template to print it in this link: Download the pattern by Pattern Universe.
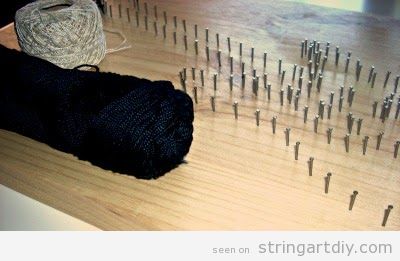
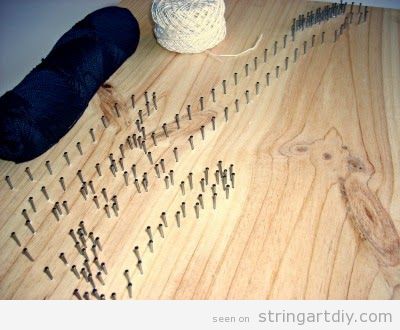
Then, we start the process, wich is almost always the same.
- You must put the pattern over the wooden board and, then, start to clue the nails on the shape.
2. Once you have finished, retire or remove the paper and you will have all the guitar shape and its decorations.
3. This is the moment when you start to put the threads over the nails. Make a loop around the nail heads. Pay special attention if you want to make the guitar in different colours. This one is in black and white but you could chose whatever colour you like the most.
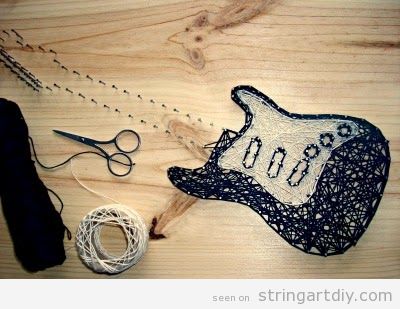
4. That’s it! Put the String Art in a wall to decorate it. This it’s also a nice handmade gift.

Have you like it? So comment and share! Thanks for reading, see you soon!
Heeey! If you are looking for an easy String Art for begginer or for make with kids and teenagers, maybe this video made by Diego Rojas will help you.
As you can see, you only have to nail the nails in a wooden board following the line of a circle. We recommend to print the shape or draw it using a pencil and then pin the nails around it. After that, you must cross the threads in the order you can see on the video. Then, repeat the process twice using some different colours and that’s it.
An that’s all! You will have a perfect handmade project to decorate a wall.
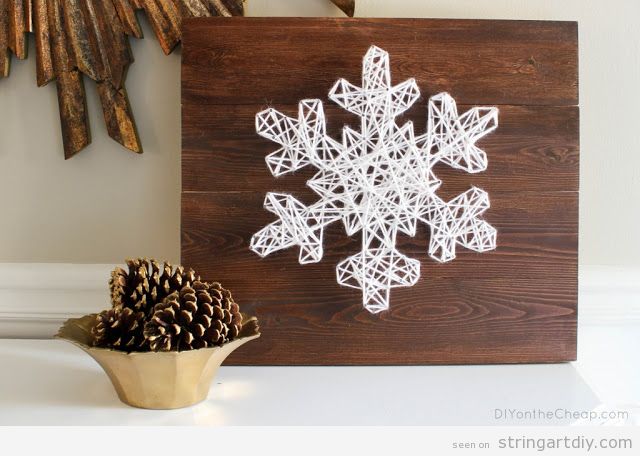
Yeeeey! The Chistmas countdown has started! Just one month left! So, oficially, we can finally start to think about Christmas decorations, Christmas gifts and Christmas projects! We want to start with this wonderful snowflake String Art.
We have found this tutorial on Decoración Ideas. As it is explained in Spanish, we let’s try to translate it to English.
To make this String Art, will need these materials:
- Wooden board
- Hammer
- Wood glue
- Printer
- Projector (optional)
- Pencil or chalk
- Nails
- Threads
- Drill, dowels, tenterhooks and rings or shackles (to fix it to the wall)

As you can see, the first step is to print the snowflake pattern or, if you have a projector, it could be perfect use it to project the image directly on the board.
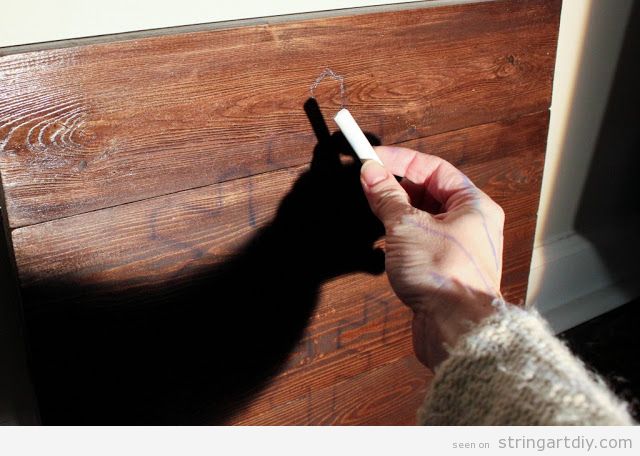
Then, you have to draw the snowflake shape on the board using a pencil or a chalk and following the projected shadow lines.
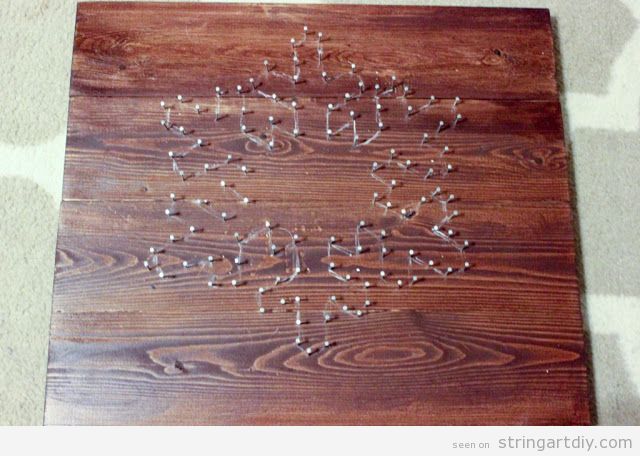
The next step is to clue the nails along the drawing. You can leave a 2 or 3 centimeters between them, but make sure that they are pinned in the most important vertexs, angles or corners.
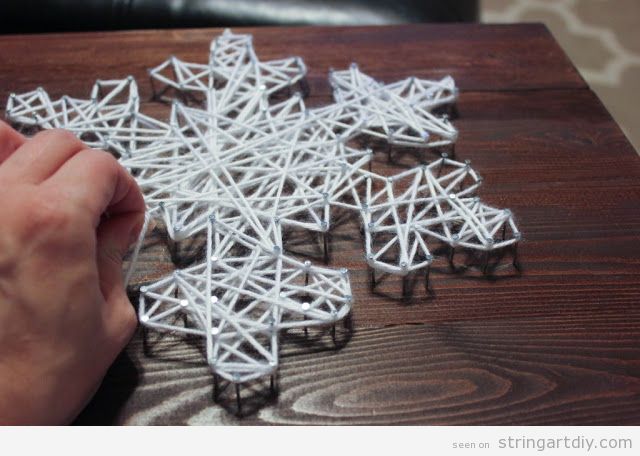
The last step is to pass the thread through the nails or across them and make some knots in order to fix it well.
And that’s it! You have this gorgeous snowflake shaped String Art to decorte yout home at Christmas or even to offer as a handmade gift. Have a nice weekend!
Hello everybody! How are you doing? We are fine and ready to make a lot of crafts to give on Christmas. String Art is always a perfect handmade gift and there are a plenty of ideas to make using this technique.
For example, is you or the person your are gonna to offer the presents loves dance, these dancer and ballerina images printed on board with threads all over their dresses on movement are just wonderful.
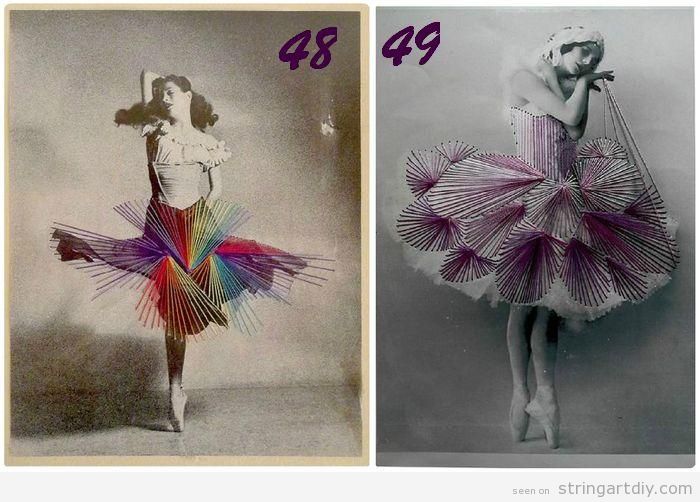
First of all, you should watch this video by brperf yo know How to get a picture printed on wooden board DIY.
After that, you have to clue the nails following the shape of the dresses and theirs folds, even you can make these lines longer and make them bigger, following the direction line that the dresses are pointing to. As you can see, it creates a wonderful movement effect that makes the pictures even wonderful. The colours chosen are important too to create this impression.
Do you like it? In my opinion, it’s a small piece of art. <3
We always identify the pink ribbon as a breast cancer symbol. We usually wear this pink ribbon pinned in our lapel to support this cause.
Maybe we can make this Pink ribbon String Art and sell it in markets to collect or raise money for breat cancer investigation. What do you think about this idea?
Well, here you have a video by CuquiLife to learn how to make it step by step:
As you can see, you will need:
– Wooden board
– Sandpaper
– Chalk paint
– Paper
– Pencil
– Nails
– Hammer
– Pink thread
Then, pay attention to the steps shown on the video, it’s easy and fun. Enjoy making this charity project and we hope that you will raise a lot of money to help these brave women. Stay strong!
Lately I’m quite obsessed with mandalas and its geometric shapes and repetitions. I really have a good time drawing them. It’s very relaxing and creative. In addition, once you have the mandala drawn, colored or made, it’s a nice piece of decoration and, if you love meditate or you practice yoga, it’s a good point to focus your mind while you try to reach the Nirvana.
Today we have searched a good tutorial to show you how to make a beautiful Mandala String Art full of colors. Here you have a nice video made by Diônatan Bertelli
As you see, you will need:
- Round shaped wooden board (painted in black, white or the color you like the most
- Nails
- Hammer
- White, soft purple, dark purple, soft or pastel green and turquoise threads.
- Picture or Frame Hangers.(
The process is simple and I think that you already know it, but as you can see on the video, it’s about to tie the thread into one nail and its opposite and repeat it until you have finished. It’s better to watch the videotutorial to be sure that you’re doing it right.
If you like it, share the post in your social networks and spread the knowledge 🙂
Do you know Poros? He is an adorable character from the videogame “League of Legends”. Well, today we want to bring to you this videotutorial (sorry, it’s in Spanish) to learn how to make a Poros String Art with, pay attention, it includes LED lights and the result it’s amazing!
To make this, you will need:
- Wooden board, 30x3o centimetres
- Nail
- Hammer
- Threads
- Pattern
- Led strips
- Transformer
- Wire
- Scissors
- Soldering iron
- Tin
Then, you have the print or draw the pattern and clue the nails, as we ussually do. Remove the pattern and place the led strips where you want them to be. The wire process it’s better to watch on the video than reading the instructions here. Once the led strips are connected, start to tie the therads over and across the nails.
Once finished, turn on the led lights and voilà, here you have the Poros illuminated! As you can see, the piece could serve as wall lamp and it could be a nice lamp decoration for a kid or teenager beedrom.
What do you think? Do you love it? Send us pictures of your projects to our Twitter @stringartdiy or to our Facebook String Art DIY
Thanks to 1dalanyo for sharing with us this amazing tutorial and see you soon 🙂