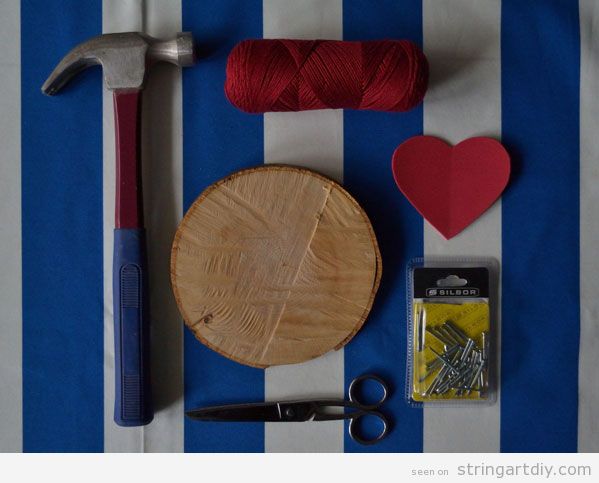
To make this wonderful heart shaped String Art you will need:
– Hammer
– Red String
– Heart Pattern (made by felt, foam or cardboard)
– Tree or trunk slice
– Nails
– Scissors
After that, you need to put the felt heart shaped pattern on the slice and clue the nails all over it.
Then, you just need to pass or cross the thread and fix it on the nails in multiples directions and you will have this wonderful piece to decorate a room, a cafe, a wedding or whatever you want.
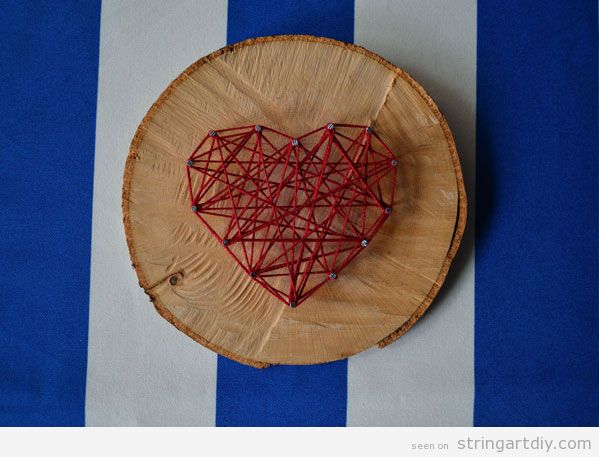
Source:_ Salacadula

Here you have a free String Art pattern to download. As you can see, it’s a bride and groom shape, a perfect DIY for decorating a wedding or to give a handmade gift to the married. Do you like it? I think it¡s simple, but beautiful and elegant.
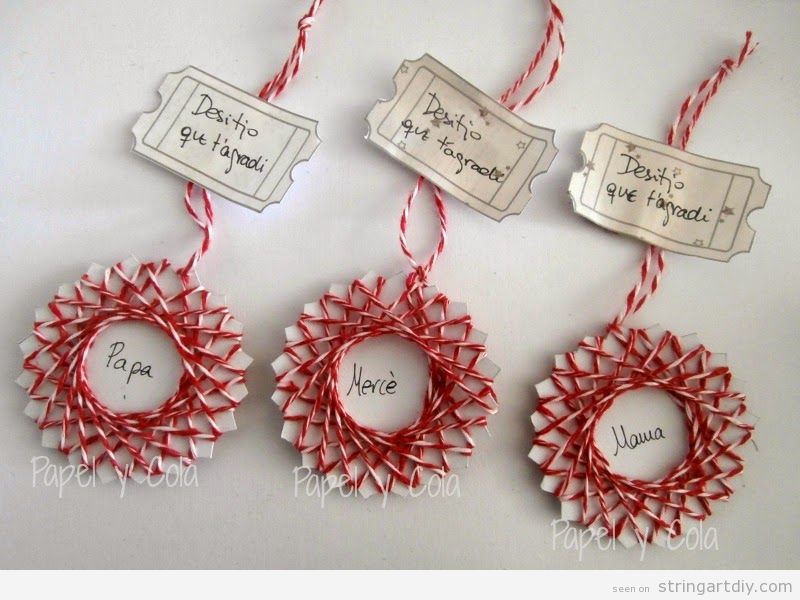
These tags say in Catalan “Desitjo que t’agradi”, what means “I hope you like it”. There star shaped String Art is a wonderful idea to package your Christmas gifts.Source: Papel y cola
Panduro Hobby Webtube show us how to make a String Art using our pet shape, using a photo of him or her as a pattern.
In this case, it’s a lovely teckel. We encourage you to make the same with your dog, cat, bird or whatever you like. It’s easy and a a great handmade gift or decoration. Go ahead!
In this case, it’s a lovely teckel. We encourage you to make the same with your dog, cat, bird or whatever you like. It’s easy and a a great handmade gift or decoration. Go ahead!
Pleaee, don’t buy fresh Christmas tree, save the planet! There are many options to have a wonderful Christmas tree at home, like this one, made just using pins and threads.
You can learn how to make it on a wall by watching this tutorial by Michaels Stores
You can learn how to make it on a wall by watching this tutorial by Michaels Stores
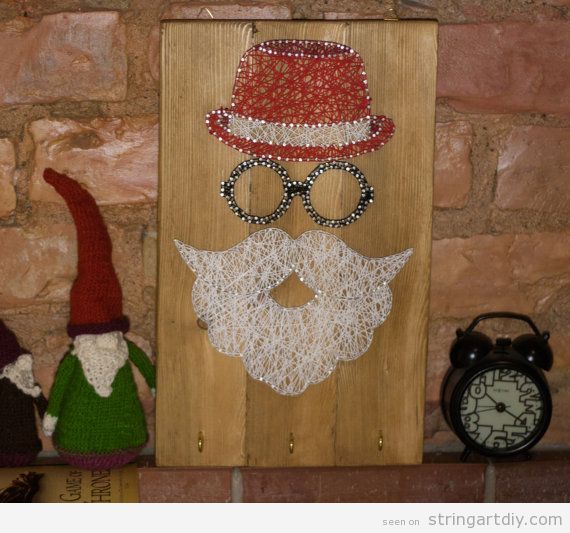
If you like this hipster and modern Santa Claus String Art to decorate your home (or shop or cafe) at Christmas, you can make it yourself or buy it at Etsy: Goodlights- Santa Claus
Enjoy making Christmas cfrats at home with your family!
Enjoy making Christmas cfrats at home with your family!
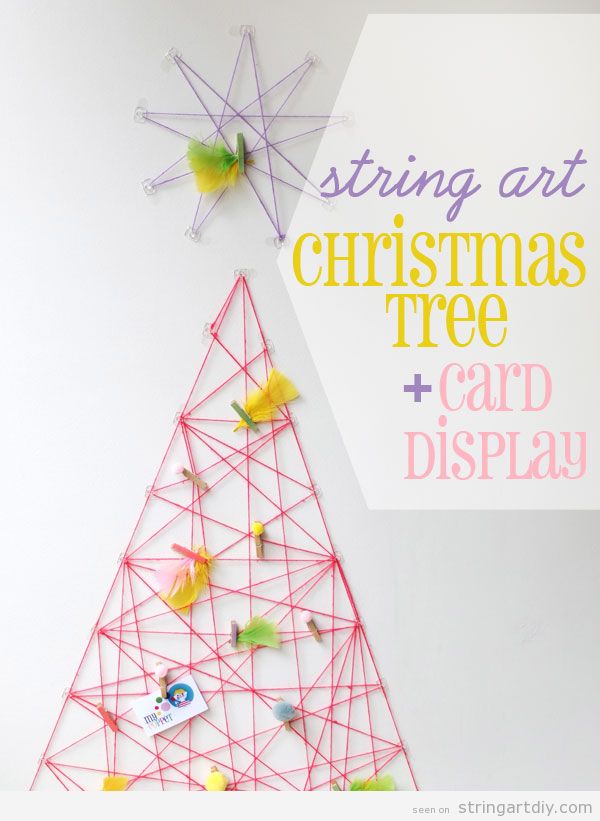
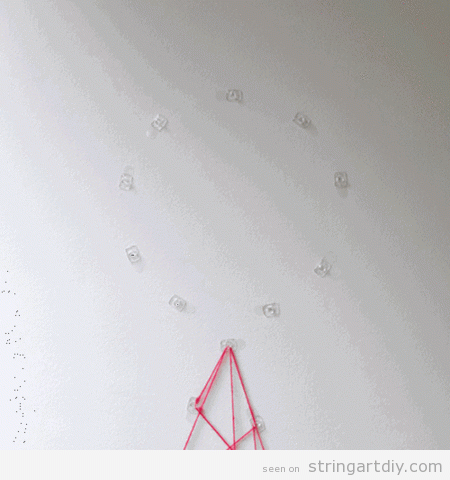
Do you like this wonderful String Art Christmas Tree on a wall that also could be used as a card display? It’s a lovely idea to decorate your home at Christmas and your kids will love it!
You can see the full tutorial visiting this suite: My Poppet – STRING ART CHRISTMAS TREE & CARD DISPLAY
Cristina Alvaga show us on this tutorial how to make a String Art writing the poupular message: BE HAPPY.
She has chosen two thin wooden boards and has glued them. Also she has printed the letters (you can chose the font ot type you like the most), and then, she has clued the pins all over the letters and has put the threads all over it, using two different colours: one for the shape, the other one for the stuffing.
I really love it! And you?
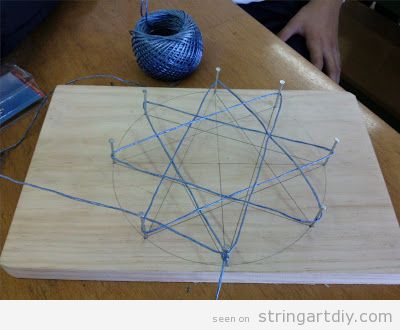
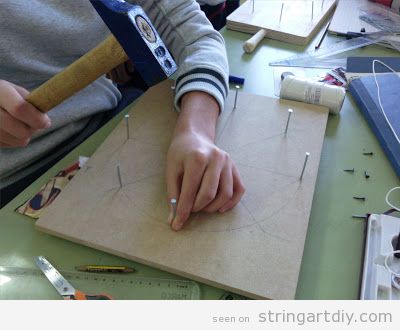
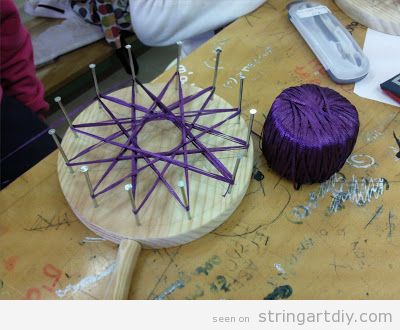
Are you looking for a crrat or technology (or even marths) project to make with your kids or students? Here we have a lovely one, perfect for Christmas (that are coomiing…).
As you can see, is a Star String Art on a wood base, and the results can be very different.Here you have the tutorial made by Plástica en el Valle (a blog for the students of Ramón del Valle-Inclán secondary school, in Sevilla, Spain).
As you can see, is a Star String Art on a wood base, and the results can be very different.Here you have the tutorial made by Plástica en el Valle (a blog for the students of Ramón del Valle-Inclán secondary school, in Sevilla, Spain).
Enjoy it!


Recent Comments