Vintage

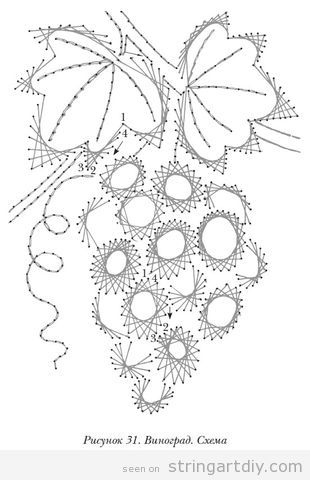
Here you have a free pattern to free download. As you can see, it’s a grape bunch, and you can make this String Art using dark purple or green, as you like the most.
This pattern it’s kind of vintage DIY. We thinkg that is a good handmade craft to decorate an ecologic shop, a veggie restaurant, a winery or a wine cellar that maybe you have at your kitchen or garage.
Do you like it? We hope yes!

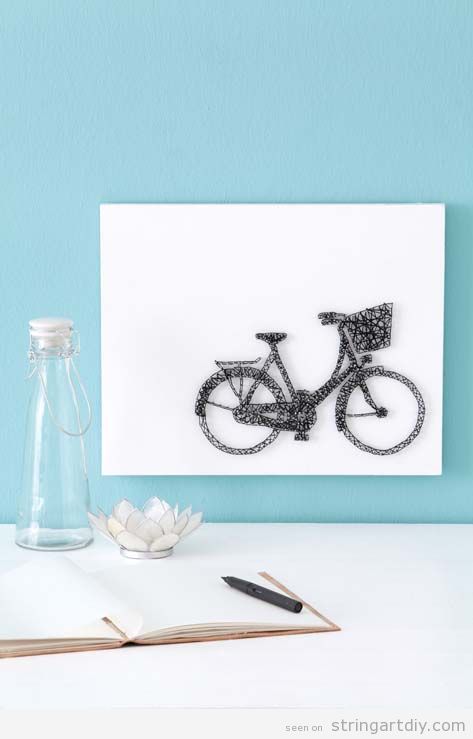
Hi everyone! Here you have just another great String Art to decorate a cafe, a trendy shop or just a wallroom at your home, with this bicycle string art. It’s even more wonderful if you are a bicyle lover.
In order to do this craft just follow the following instructions.
Materials
- The template which can be downloaded here
- A thick marker
- A pine wooden board
- Spray glue
- Panel pins
- Scissors
- Pliers
- A pencil
- Crochet yarn
Step by step tutorial
Follow carefully these steps to make this craft by yourself.
Step 1
Expand the template or use a design of your choice. We chose a bike, inspired by a photograph. Then, enlarge the template so that you have enough space between the pins of the panel and the design fits your wooden board.
Step 2
Paint your wooden board first, if you prefer. While the paint is being applied to dry, you can plan where you will hammer the pins on the panel in the picture: mark the points with a marker. Remember to leave enough space between the panel pins.
Step 3
Spray glue on the back of the template and stick it to your wooden board.
Step 4
Use a hammer to insert a panel pin at each marked point. You can grasp the pins with pliers if you struggle to hold them with your fingers.
Step 5
When the design is complete, straighten the pins with the pliers or hit them with the hammer to straighten them if they are a little crooked. Remove the paper, starting from a corner.
Step 6
Choose a starting point and tie a double knot around the first pin. Rotate the rope around the head of the next pin and continue in this manner. Although traditional rope art is done strictly according to design, our method is not so specific: you can build your image as you wish. However, try not to rotate the string more than two or three times around the same panel pin and fill in the gaps as you go.
I hope you enjoy making this bicycle string art, looking forward your comments.

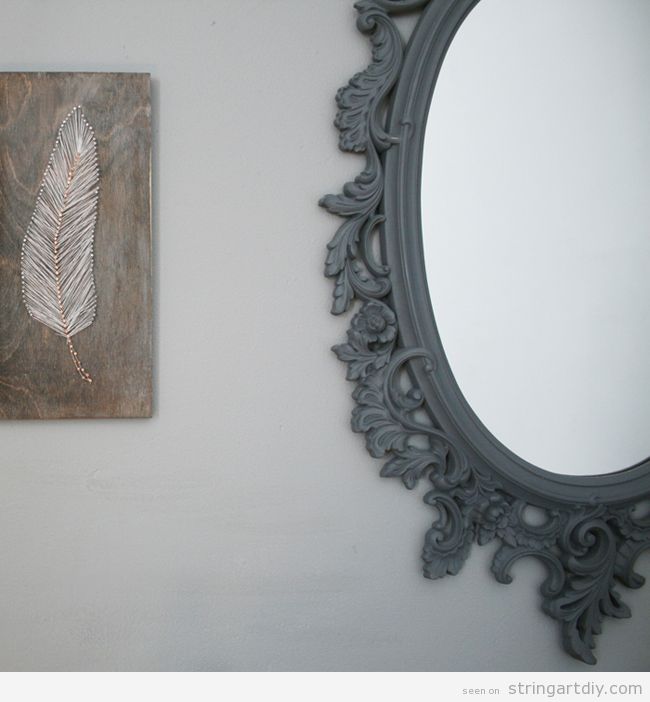
Hi, guys! Today we want to show us a wondergul idea. Pay attention to this dark wooden board because it’s fantastic and itself made a great piece to decorate a wall, vintage style. The feather is light and nice, it suits a lot with the mirror and the dressing table.
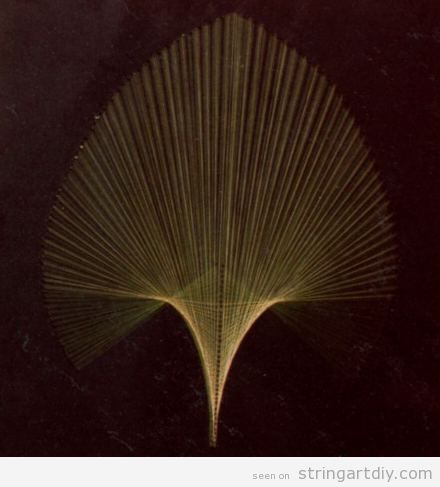
Wow, there’s a real vintage String Art decoration, hanged on a wall from the 70’s to nowadays!
Via Maria Masini Furlough on Pinterest