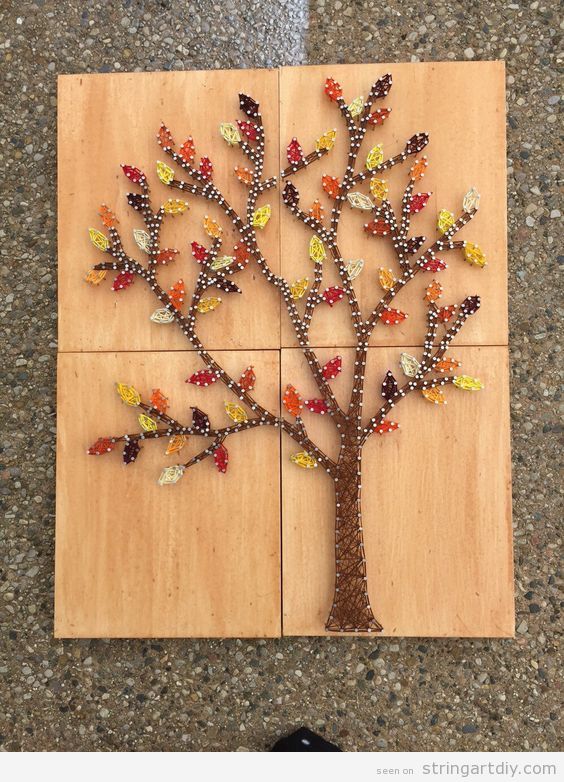
Hi everyone! We really love fall season, so we are happy and cheerful when we find and make this kind of String Art projects to celebrate it.
As you know, the fall emblem is the leave in different colours as brown, dark red and ochre. But there are more, as trees withouy leaves or trees with falling leaves; pumpkings (not only in Halloween, but since september to december) and candy corn. The last one this is clearly a Halloween symbol and we are sure you have eat tons of them!
So here you have three wonderful ideas to decorate DIY your home, shop, café or office in an autumn mood.
Happy fall to all of you!

Source: Rhapsody Crafts
Source: VotreVieEnRose on Etsy
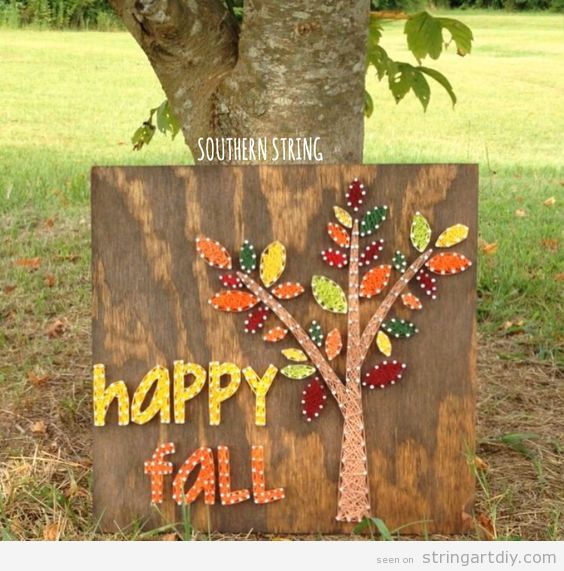
Source: Southern String Art
Yeah, we are in fall season and pumpinks starts to appear in every cornerm, so he have searched for pumping String Art.
The normal thing is make a beautiful pumping in a regular wooden board, like this one by Jillibean Soup:
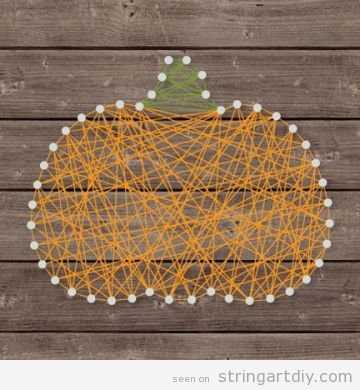
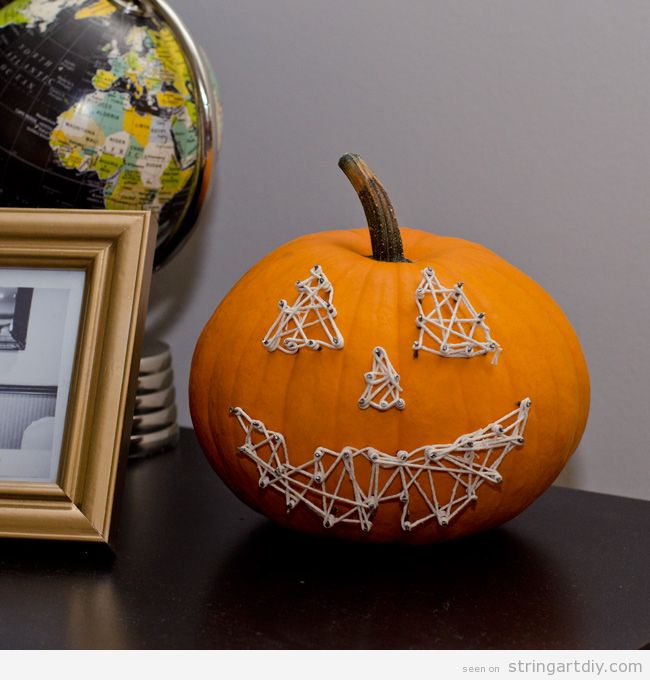
But what could happen if we invert the process and we use a pumpkin as a canvas? The results are amazing! As you can see, we pin the nails on the pumpink and then the following stepas are the regular ones.
BOO GHOST PUMPKIN STRING ART
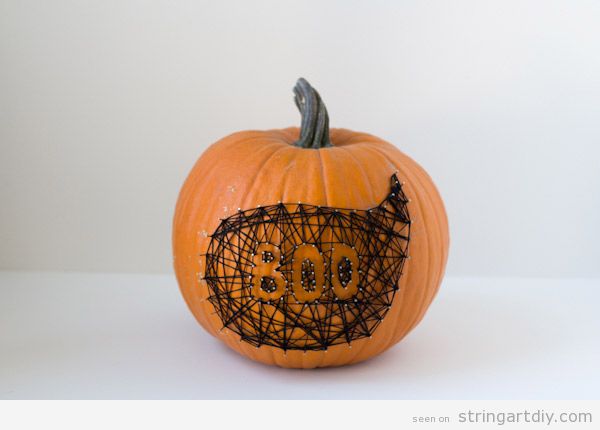
If you don’t like to crave a pumpkin, there are plenty of possibilities, like this boo and ghost shaped String Art made on a pumkin. You can see the full tutorial at: Lovely Indeed – diy string & nail art pumpkin
ZOMBIE PUMPKIN STRING ART

Yeah, zombies are terrifying so this is a perfect DIY decoration for Halloween.
You can know how to make it by visiting Dream a little bigger – ZOMBIE STRING ART PUMPKINS – NO CARVE!
EVIL FACE PUMPKIN STRING ART
This is the typical evil face that we use to carne on a pumpkin, but this String Art is easier, quicker and better!
HEART PUMPKIN STRING ART

If you just love autumn and pumkins and you don’t want to scare anybody, you can make a heart shaped string art on this vegetable, well, is technically a fruit. This would look awesome on your front door.
You can found the full tutorial on this link: Lines Across – Pumpkin String Art
Have you liked it? If so, please, share the post on yout social networks! Thanks! 🙂
Lately I’m quite obsessed with mandalas and its geometric shapes and repetitions. I really have a good time drawing them. It’s very relaxing and creative. In addition, once you have the mandala drawn, colored or made, it’s a nice piece of decoration and, if you love meditate or you practice yoga, it’s a good point to focus your mind while you try to reach the Nirvana.
Today we have searched a good tutorial to show you how to make a beautiful Mandala String Art full of colors. Here you have a nice video made by Diônatan Bertelli
As you see, you will need:
- Round shaped wooden board (painted in black, white or the color you like the most
- Nails
- Hammer
- White, soft purple, dark purple, soft or pastel green and turquoise threads.
- Picture or Frame Hangers.(
The process is simple and I think that you already know it, but as you can see on the video, it’s about to tie the thread into one nail and its opposite and repeat it until you have finished. It’s better to watch the videotutorial to be sure that you’re doing it right.
If you like it, share the post in your social networks and spread the knowledge 🙂
The school year has already started and we need a lot of ideas to make crafts with our kids or little students.
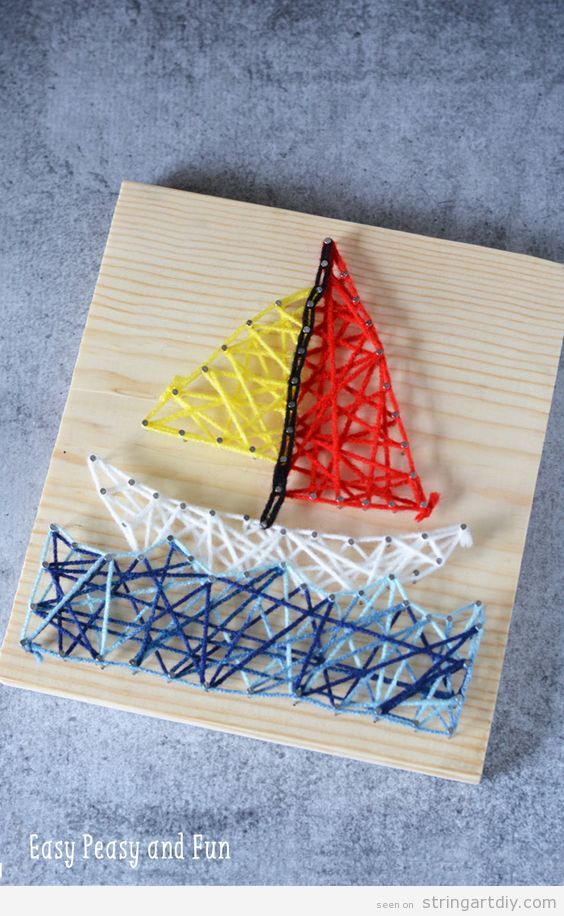
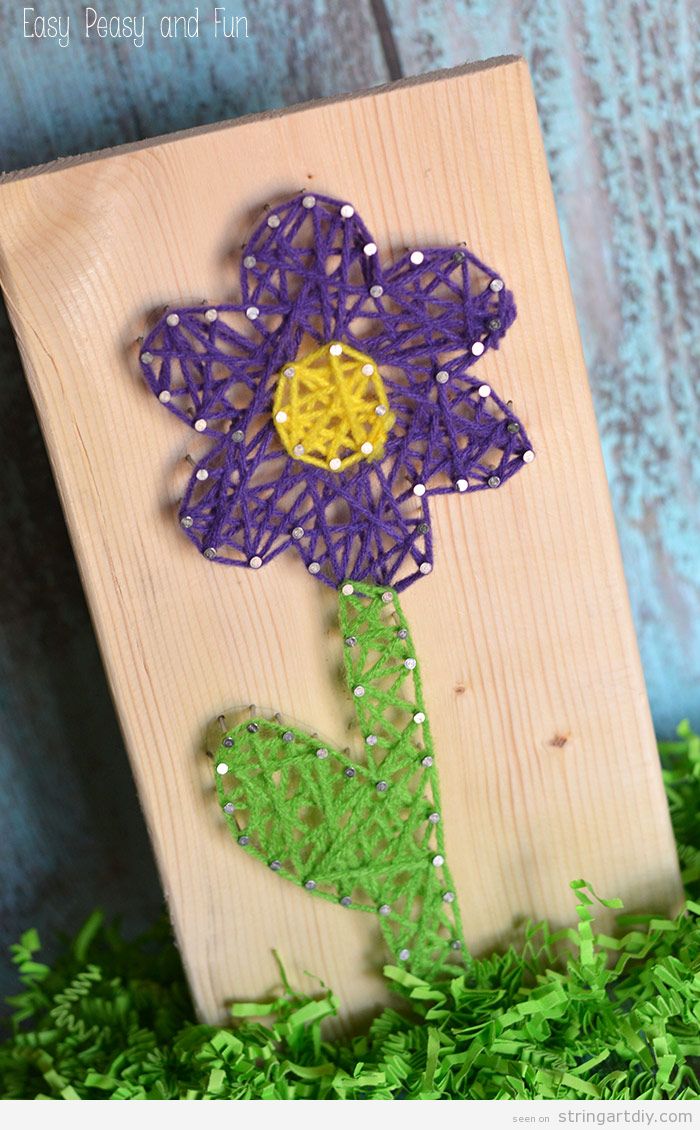
Easy Peasy and Fun it’s a lovely site full of crats ideas for kids, as his name says, they are easy-peasy and fun to make. We have searched his String Art projects fors kid and we have found these 4 lovely crafts.
As you already know, to make it, we just need a wooden boards, nails (or thumbtacks), a hammer and threads (nylon, cottonr or wool)
Here they are!
BOAT STRING ART
LADYBUG STRING ART

STAR STRING ART

FLOWER STRING ART
Do you know Poros? He is an adorable character from the videogame “League of Legends”. Well, today we want to bring to you this videotutorial (sorry, it’s in Spanish) to learn how to make a Poros String Art with, pay attention, it includes LED lights and the result it’s amazing!
To make this, you will need:
- Wooden board, 30x3o centimetres
- Nail
- Hammer
- Threads
- Pattern
- Led strips
- Transformer
- Wire
- Scissors
- Soldering iron
- Tin
Then, you have the print or draw the pattern and clue the nails, as we ussually do. Remove the pattern and place the led strips where you want them to be. The wire process it’s better to watch on the video than reading the instructions here. Once the led strips are connected, start to tie the therads over and across the nails.
Once finished, turn on the led lights and voilà, here you have the Poros illuminated! As you can see, the piece could serve as wall lamp and it could be a nice lamp decoration for a kid or teenager beedrom.
What do you think? Do you love it? Send us pictures of your projects to our Twitter @stringartdiy or to our Facebook String Art DIY
Thanks to 1dalanyo for sharing with us this amazing tutorial and see you soon 🙂
 Today we bring us 4 patterns inspired in islamic geometry that we can see in islamic art, specially in tiles and wooden lattices. You can download it for free, as usual.
You can use these free pattern to make a wonderful geo String Art DIY too, even if your are not muslim, but you really love their artwork or culture.
There are not very easy to make because the figures are complex, but the amazing result deserves the hard work. We hope you enjoy it.
You can show us your piece of arte once finished via our Twitter @stringartdiy or facebook String Art DIY
Source: Geometría Dinámica
Andrea Vlogger Gt show us in this video 2 ways to make a String Art DIY, the “inverse way”, filling with thread all the space left outside the main figure, in this case, a heart and, on the other side, the classic way, filling the figure, in this case, the word “love”, written whith a lovely handwritting typo.
As you can see, she paints the board in blue and in pink. The thing I like the most is that she uses jute or sacking thread to make this project and it looks really great. Don’t you think so?
It’s a really lovely handmade gift to your boyfriend or girlfriend, no matter if it is because of your love, your anniversary or Valentine’s Day.
Well, as always, we engourage you to send your String Art project to us via Twitter @stringartdiy and Facebook String Art DIY!
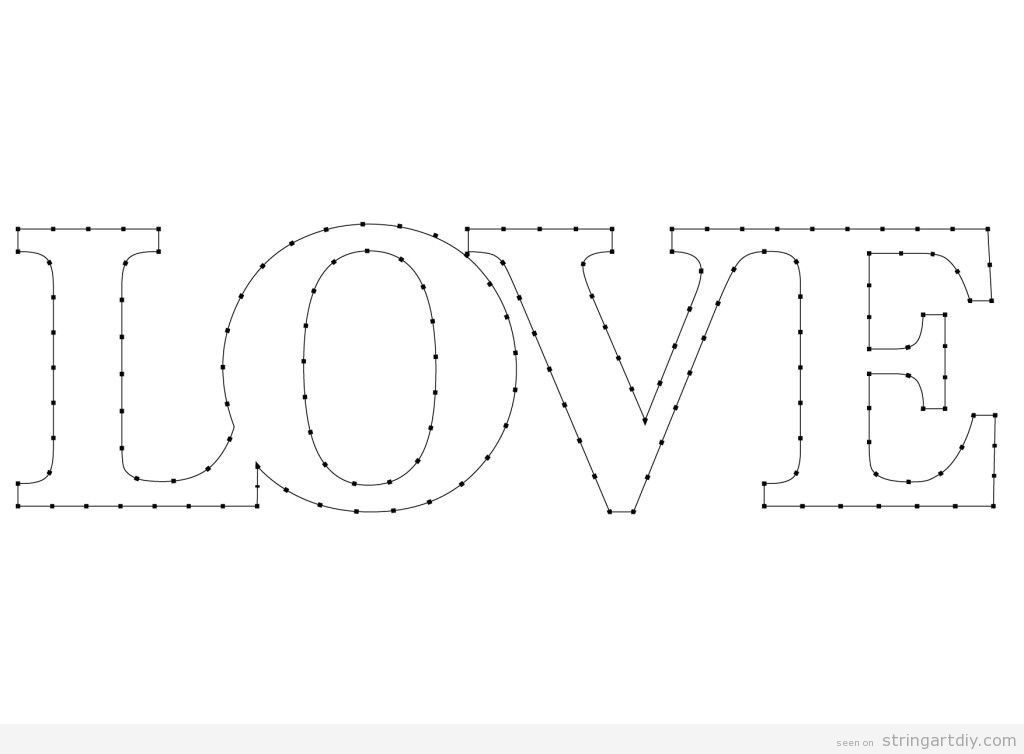
Here you have a free template to downlad with the word “LOVE” to make an adorable DIY String Art.
We have to say that the most important points are in the corners (except in the “O”). You can space the other points in the way or distance you prefer the most.
You can download de full resolution image (1754 px × 1240 px) in this link: Download LOVE String Art template
Thanks to I am a mess to share this and other patterns with us in her blog.
As always, enjoy the handmade craft and share it with us in our social networks! Twitter: @stringartdiy and Facebook String Art DIY.
See you soon!
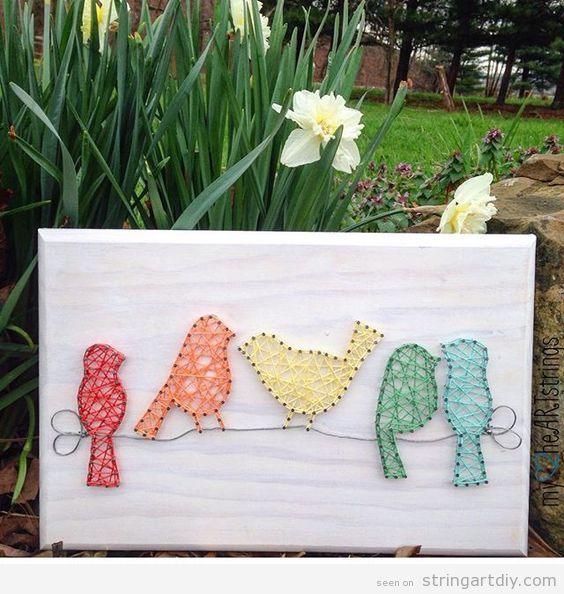
We really love this colourful String Art, the birds on the wire are just a simple and beautiful image to make a String Art. Pay attention: the wire is real and the board in a light wood board makes a perfect background. Maybe you can paint it on blue, either.
That’s a nice craft to make with kids and you can use it yo decorate their bedrooms.
Source: Pinterest (Sorry, we haven’t found the original source, if it is your artwork, please, drop us a line and we will give you the credits!)
Loo has made this great video to show us how to make a “origami” word gradient String Art. However, you can change “origami” for another word that you love the most.
As usual, you need these materials:
- Letterns pattern printed on paper
- Scissors
- Pencil
- Eraser
- Tape
- Board (1 cm or more, 0,39 inches)
- Newspaper pages
- Nails 1- 1.5 cm / 0,39 – 0,59 inches (the smaller, the better)
- Hammer
- Coloured threads
- Tow or brush (it depends on the paint you have chosen)
OPTIONAL:
- Acrylic paint
- Spray
- Alcohol ink
The steps are easy, we recommend you to watch the video to see all the process.
Enjoy it!
Recent Comments